
Woofsnaval: an outrigger canoe
The weather was nice and I was out doodling around with Griswold, which led to thoughts of improving the sailing rig. It reached the point where every component had a plan for improvement drifting in my head. The one stumbling block my mind's eye couldn't get over was how to improve the connection of the outrigger booms to the canoe hull without modifying the hull. The boat-fever was starting to rage, as I kept hitting this same wall, over and over agian.
Hey jezra, if your are going to replace just about everything, why not just make a whole boat? …and design it specifically to have an outrigger, and maximized cockpit space?
don't mind if I do!
What I came up with, is a 4 meter outrigger canoe; made from 6mm ACX plywood and 3.5cm rigid foam insulation from the hardware store, pine and oak from a local mill, and some of this and a few bits of that. Woofsnaval because I took a picture of an insect larvae. More on that later.
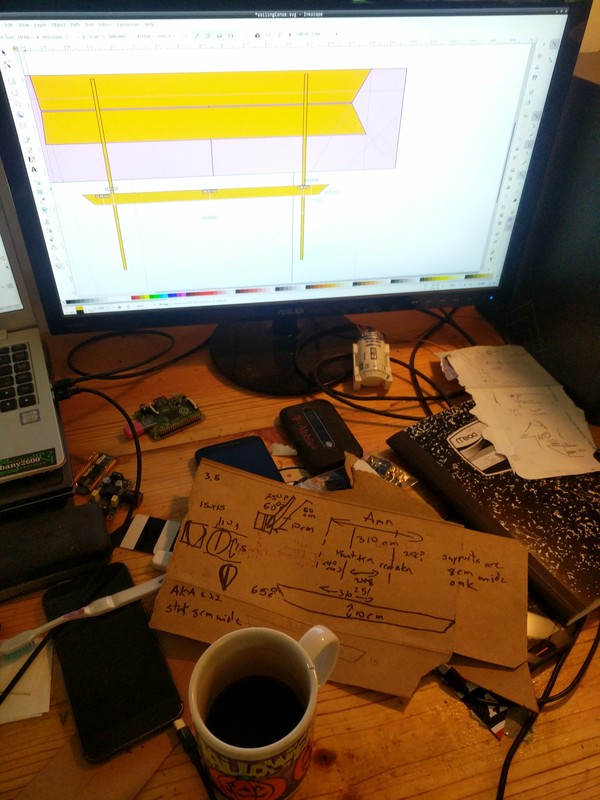
Step 0: make a plan, and write it down. It's all fine and dandy to want to make a boat, and having a plan is a great way to do that, but hot damn, having guiding material that can be referenced over and over sure does keep the build amoving.
cool, let's get crackin
Inkscape a design

In Inkscape, the sides of the hull were drawn to scale along with 122x244cm sheets to represent the standard size of plywood available at the hardware store. Now the shapes need to transfered to cardboard.
1:10 Model
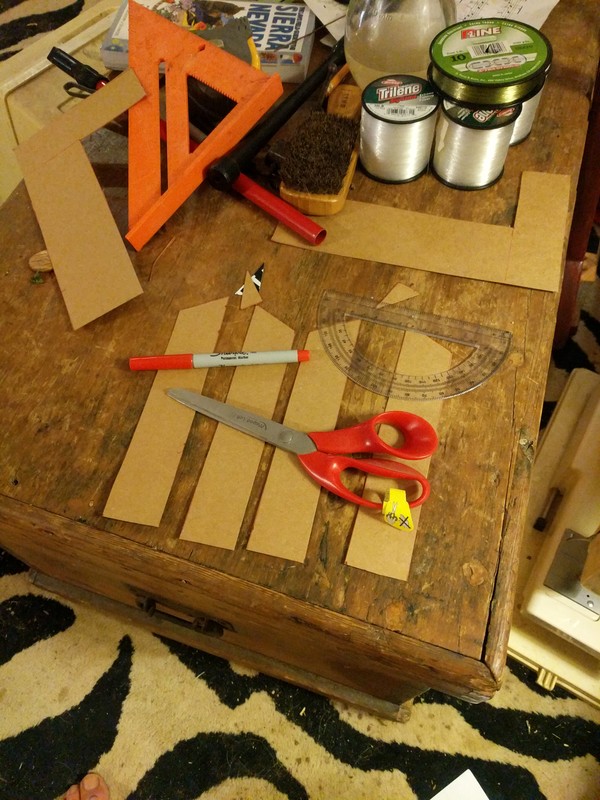 Some sweet sinister scissors cut out the 1/10th panels. Thankfully the metric system
makes computing a 1:10 ratio delightfully easy.
Some sweet sinister scissors cut out the 1/10th panels. Thankfully the metric system
makes computing a 1:10 ratio delightfully easy.
3D
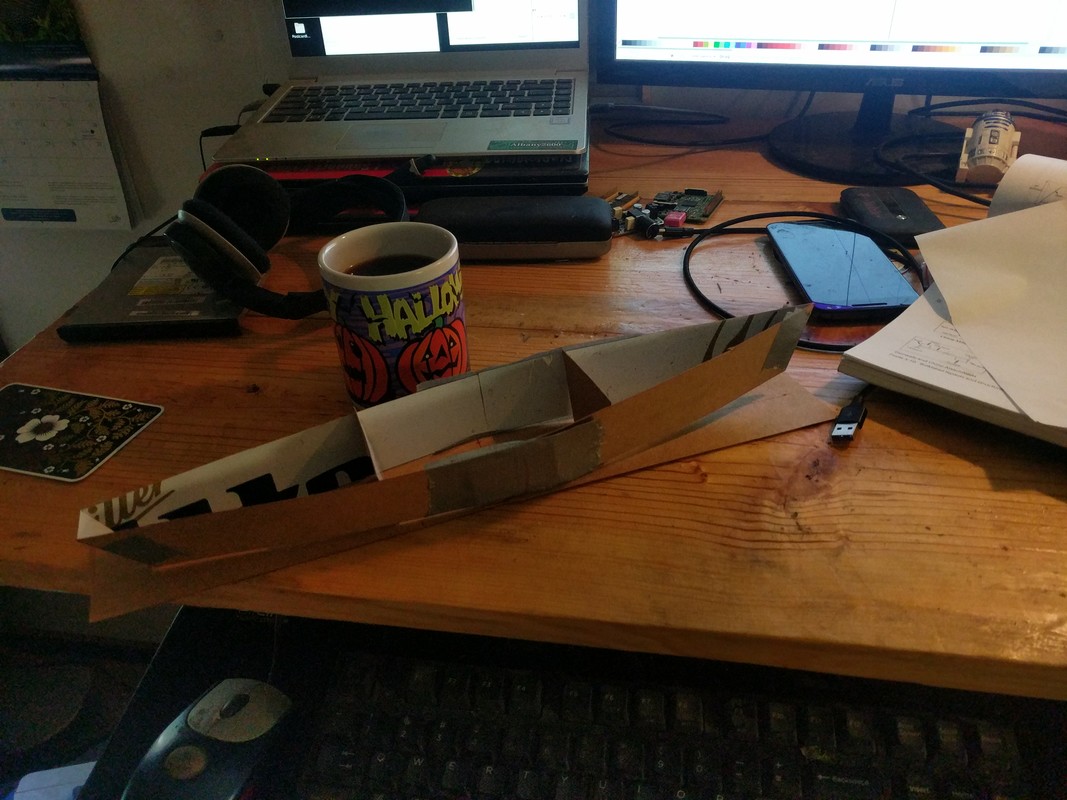 There is a flutter of the heart when first seeing the 2D panels curve in 3D. The angle at the rear
would be problematic for attaching a rudder; time to change the design.
There is a flutter of the heart when first seeing the 2D panels curve in 3D. The angle at the rear
would be problematic for attaching a rudder; time to change the design.
Making panels for the 1:1 model :)
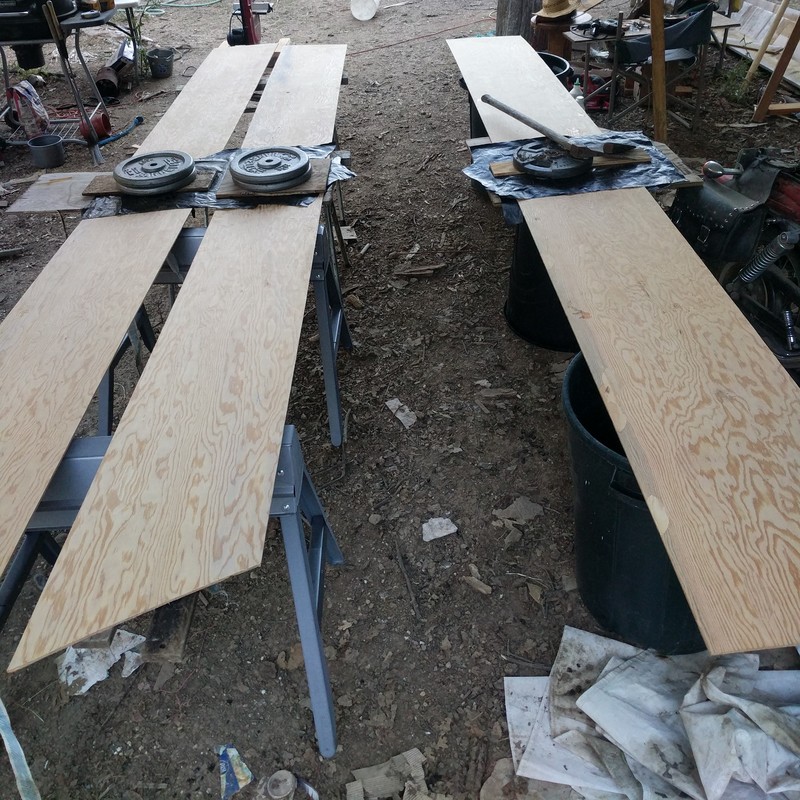 The design was laid out on ply and cut out. The panels were butt joined
with epoxy and fiberglass. The bonds I made were the least flexible spot on the new
panels. Note to self: use narrower strips of glass next time.
The design was laid out on ply and cut out. The panels were butt joined
with epoxy and fiberglass. The bonds I made were the least flexible spot on the new
panels. Note to self: use narrower strips of glass next time.
Going 3D!
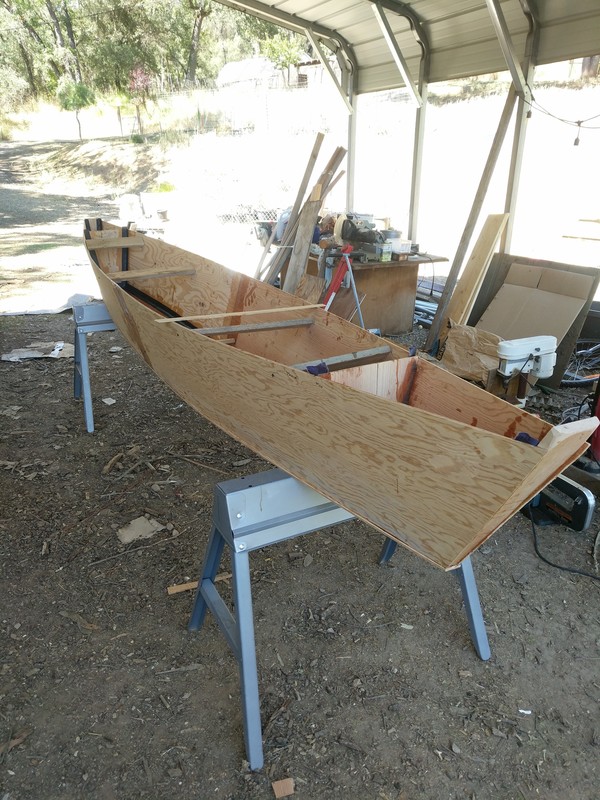
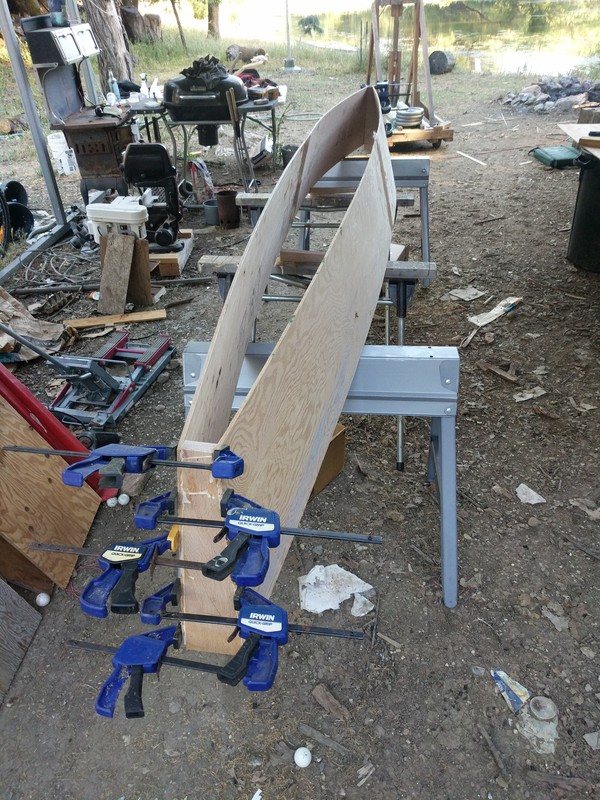 Aflutter yet again. After this glueing dried; I played around with the
form to find my ideal flare for the sides of the canoe hull; then spacers
were added to maintain the shape.
Aflutter yet again. After this glueing dried; I played around with the
form to find my ideal flare for the sides of the canoe hull; then spacers
were added to maintain the shape.
Tack the bottom in place
 The bottom panel was laid on the hull form, traced, and cut. The cut piece
is seen here being glued to the hull form.
The bottom panel was laid on the hull form, traced, and cut. The cut piece
is seen here being glued to the hull form.
Adding bulkheads
 At some point, this vessel is going to capsize or get filled with water. When it does, I will
certainly appreciate some bouyancy.
At some point, this vessel is going to capsize or get filled with water. When it does, I will
certainly appreciate some bouyancy.
Uh... where is the fillet pic?
 The inside panel joints where filleted and covered with epoxy soaked fabric. I should have a picture of that,
but instead here is a picture where the joints can barely be seens.
The inside panel joints where filleted and covered with epoxy soaked fabric. I should have a picture of that,
but instead here is a picture where the joints can barely be seens.
That shape though... dreamy
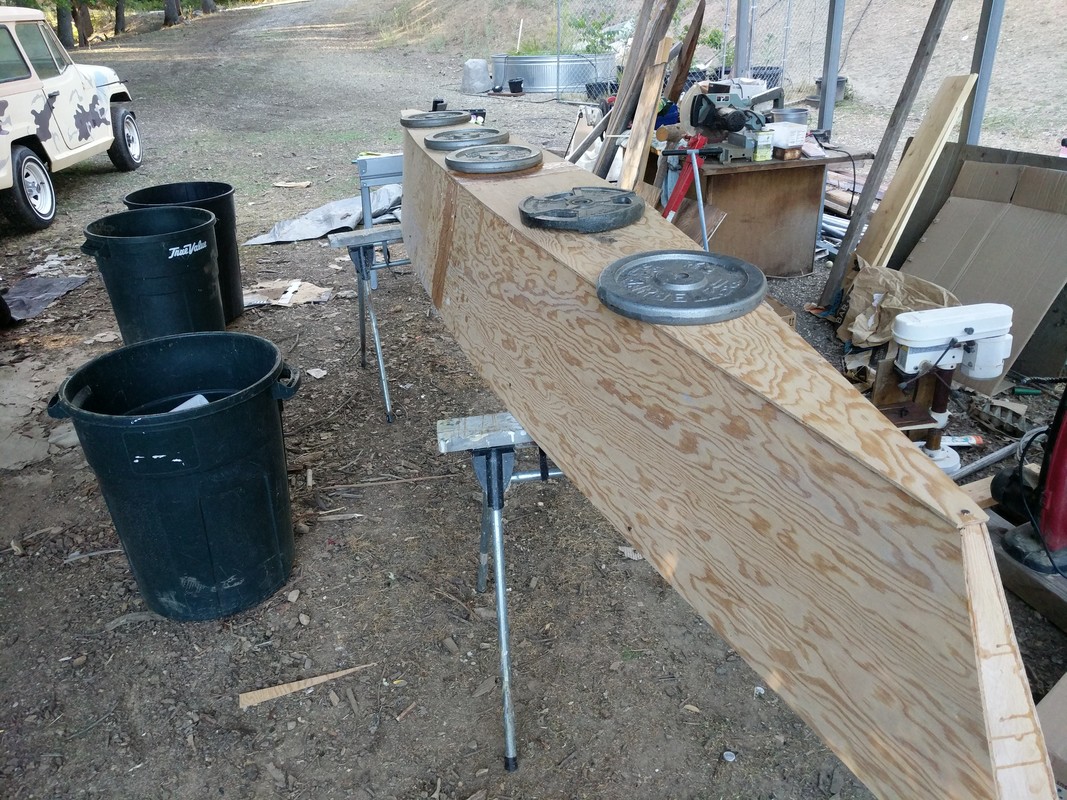
Ripping Gunwales
 Dude, I was hella ripping gunwales. With pine from the local mill, I ripped 2cm strips for gunwales and inwales.
The strips were sanded and flexed overnight under the weight of a sweet ax.
Dude, I was hella ripping gunwales. With pine from the local mill, I ripped 2cm strips for gunwales and inwales.
The strips were sanded and flexed overnight under the weight of a sweet ax.
Make hella clips from a plastic pipe
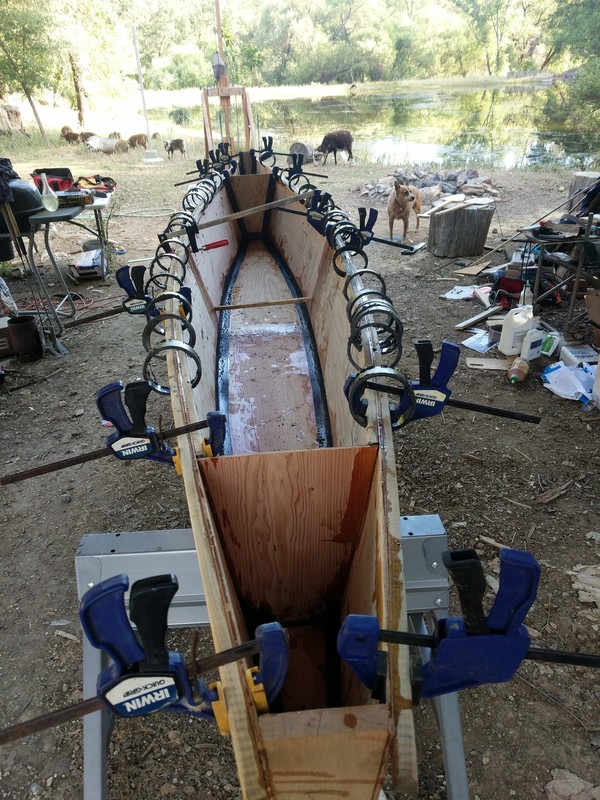 The pine strips were epoxied to the hull at the same time. An ABS plastic pipe
was cut into open rings that were used to hold the gunwales and inwales in place.
The pine strips were epoxied to the hull at the same time. An ABS plastic pipe
was cut into open rings that were used to hold the gunwales and inwales in place.
New tool
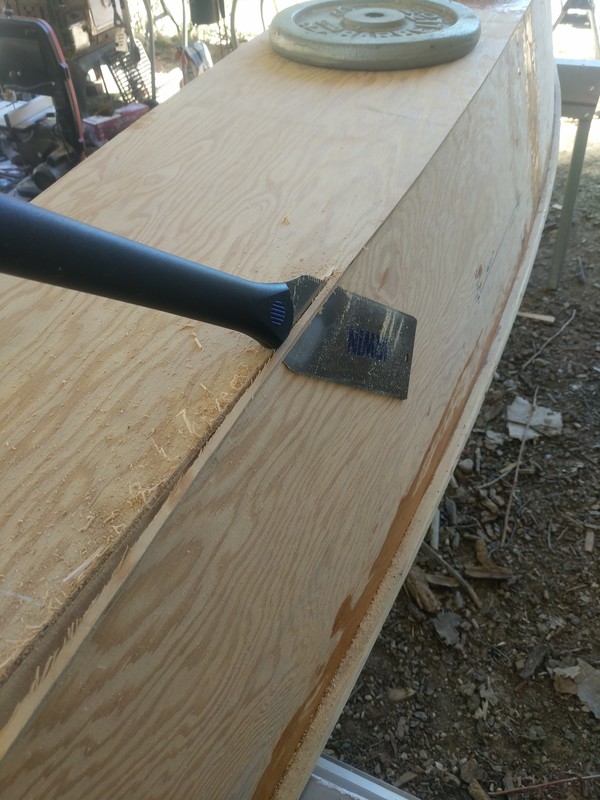 On a whim, this pull saw was added to my basket at the hardware store. Little did I know
how perfect it would be for cleaning up the bottom panel. Thanks new tool!
On a whim, this pull saw was added to my basket at the hardware store. Little did I know
how perfect it would be for cleaning up the bottom panel. Thanks new tool!
Woofsnaval
What is it? Beats me, I didn't come up with the name. Wikipedia did.
Once or twice a year, for the past few years, I have had the pleasure of encountered the California firefly.
Although it is a firefly, only the larvae are bioluminescent. To me, it is a treat
to behold and a challenge to photograph. On the night of California Independence Day, I was out in the dark, laying on
some rocks, trying to take a picture of a 5mm bug with a glowing tail that turns off when
it sees light of any kind. A picture of the glow was not captured; but a decent enough picture of the larvae was.
When I looked up the insect on Wikipedia, there was very little information, and no image. What a shame. Hold on a tick, didn't I just take a decent picture of the larvae? Yes I did, and if you ask me, the pic I took is better than the non-existent image on wikipedia, so I decided to add my picture to the article.
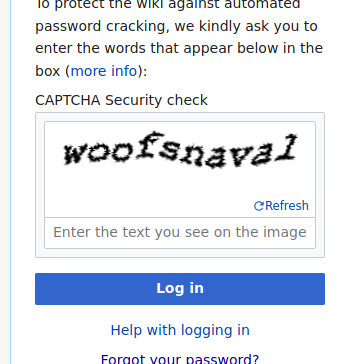
In order to upload an image directly to an article, one needs a Wikipedia account that is older than 4 days, and the editor needs to have made at least 10 edits to wikipedia. To get around this limitation, one can upload an image to Wikimedia Commons, and then edit a Wikipedia article to include the image. To do any of that, one first needs a Wikipedia account, and the account creation process includes filling out a CAPTCHA.
Anyway, the Wikipedia article for Ellychnia Californica now has an image :)
My Wikipedia CAPTCHA
 Alright, time to get back to BOAT!
Epoxy and fiberglass
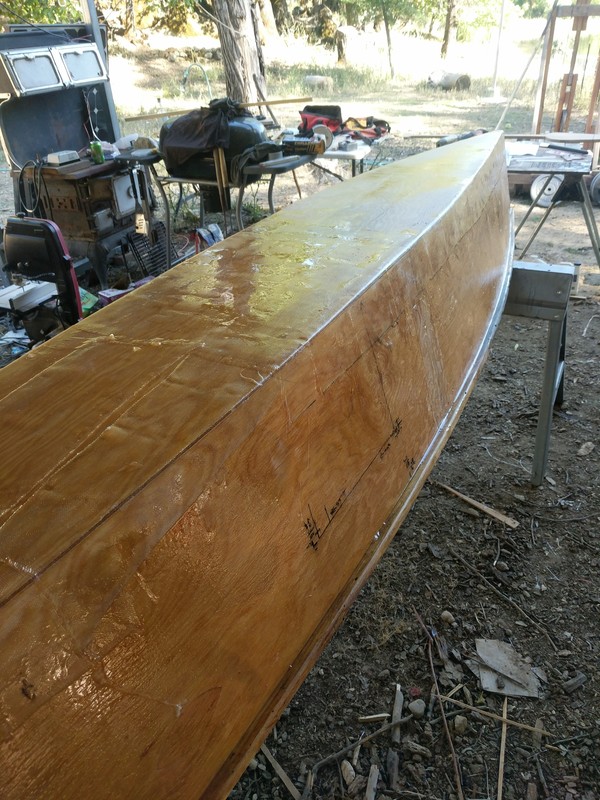 Bottom of the hull, the transoms, and all hull panel joints where fiberglassed. The panels where then coated
with epoxy.
Bottom of the hull, the transoms, and all hull panel joints where fiberglassed. The panels where then coated
with epoxy.
Outrigger design
 Back in Inkscape, the plywood stringer for the outrigger was added to the design.
Seat supports
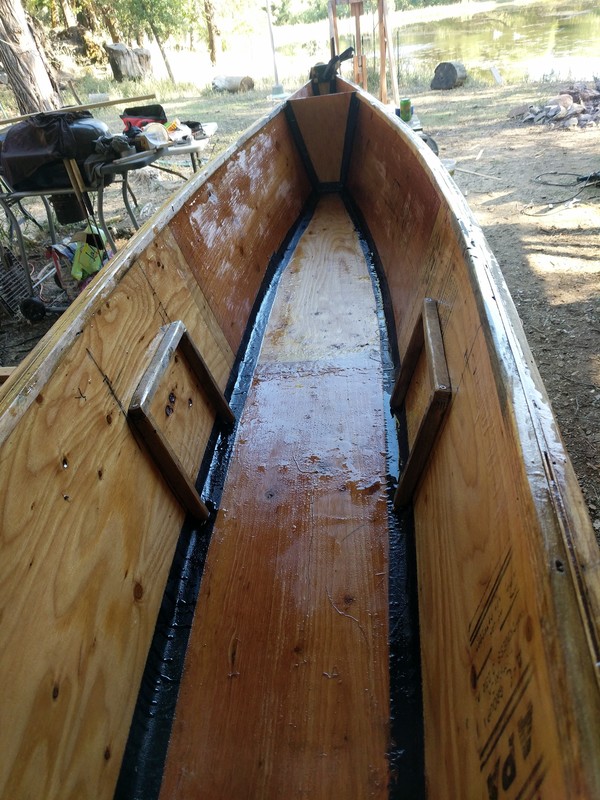 Ripped pine from the local mill, epoxied in place.
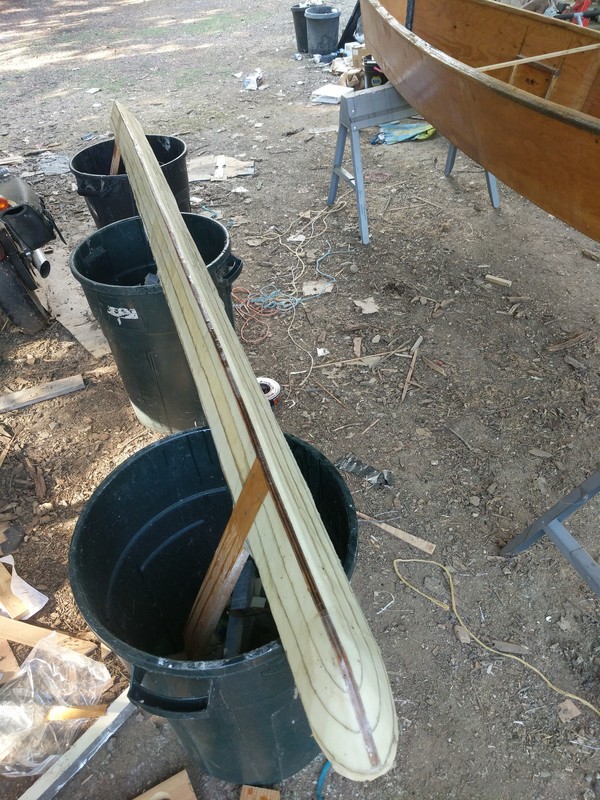
Two pieces of ply for the stringer
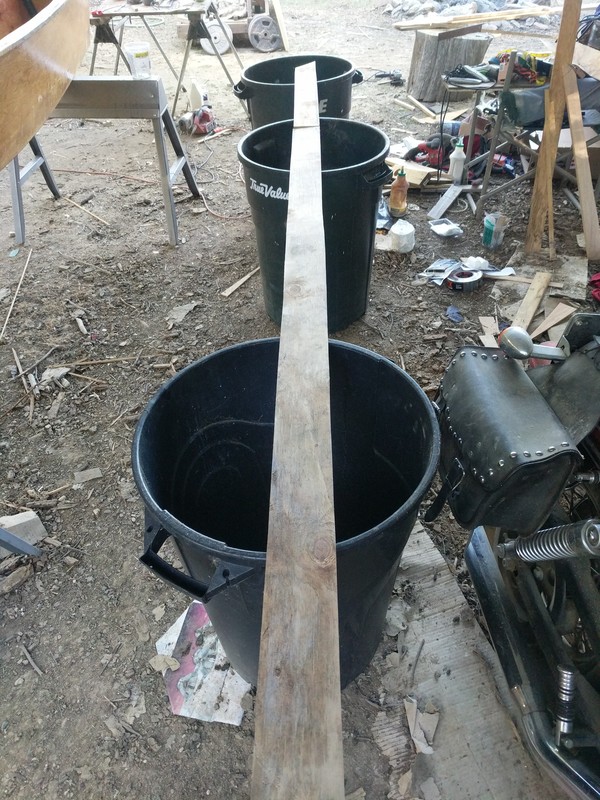 This is leftover 3/8 inch ply from uh.... *something*. The pieces will be butt joined with epoxy and glass
Foam and struts
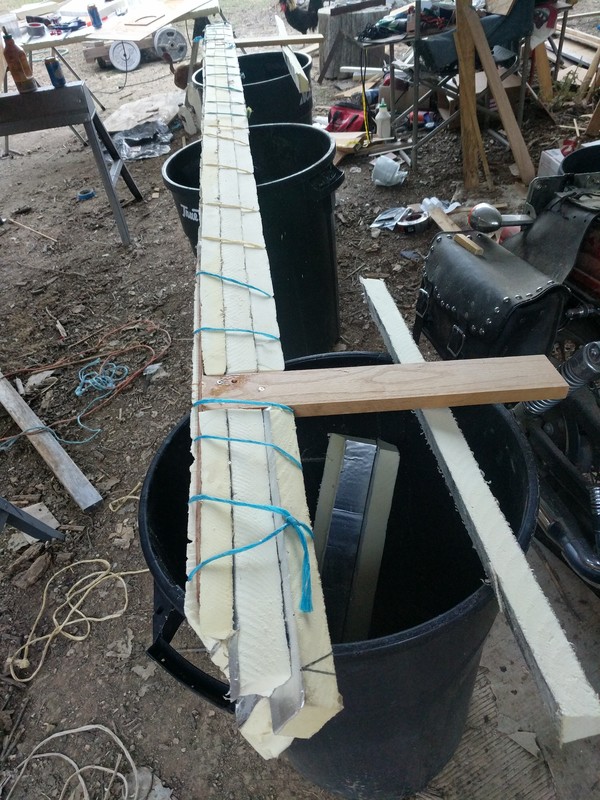 The outrigger is basically an equiangular triangle tube with tapered and rounded ends; a long "V"
with a top. The rigid insulation foam was cut to shape and glued onto the stringer. Oak struts were glued
and screwed to the stringer at a 30 degree angle so that the stuts would be flush with one side of the "V".
Baling twine from the sheep's hay was used to hold everythng in place while the epoxy dried.
The outrigger is basically an equiangular triangle tube with tapered and rounded ends; a long "V"
with a top. The rigid insulation foam was cut to shape and glued onto the stringer. Oak struts were glued
and screwed to the stringer at a 30 degree angle so that the stuts would be flush with one side of the "V".
Baling twine from the sheep's hay was used to hold everythng in place while the epoxy dried.
Wooweee, it floats
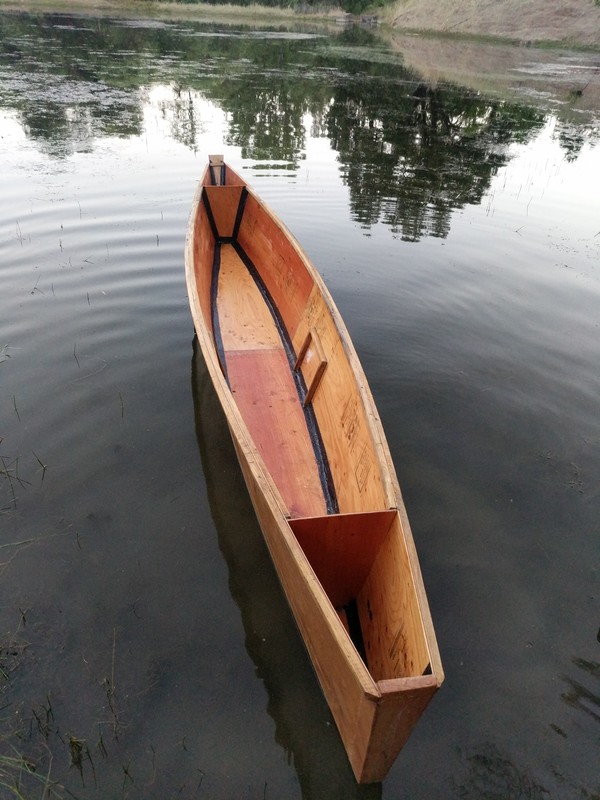 can't do much til the outrigger epoxy dries, might as well test the hull. Ok, test is over, get back to the shop
Outrigger shaping
 The outrigger foam was cut and sanded to shape, then covered with fiberglass and epoxy. Yea, it's mostly straight-ish.
Heyooo birdo!
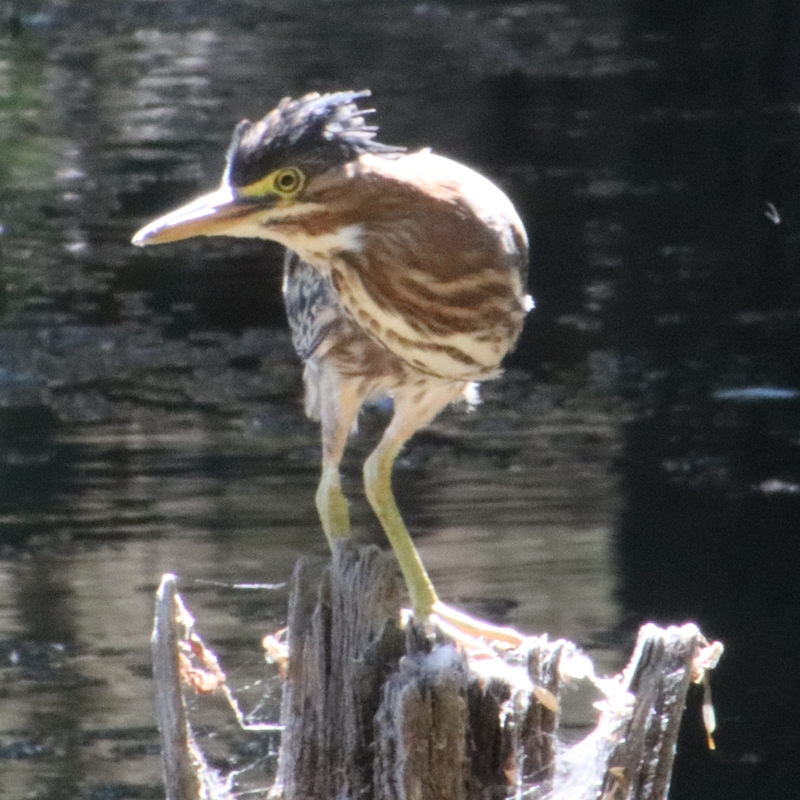 While I was boatcrafting in the shop, a
Green Heron
came by for a visit. Hey buddy!
While I was boatcrafting in the shop, a
Green Heron
came by for a visit. Hey buddy!
Measure Hella
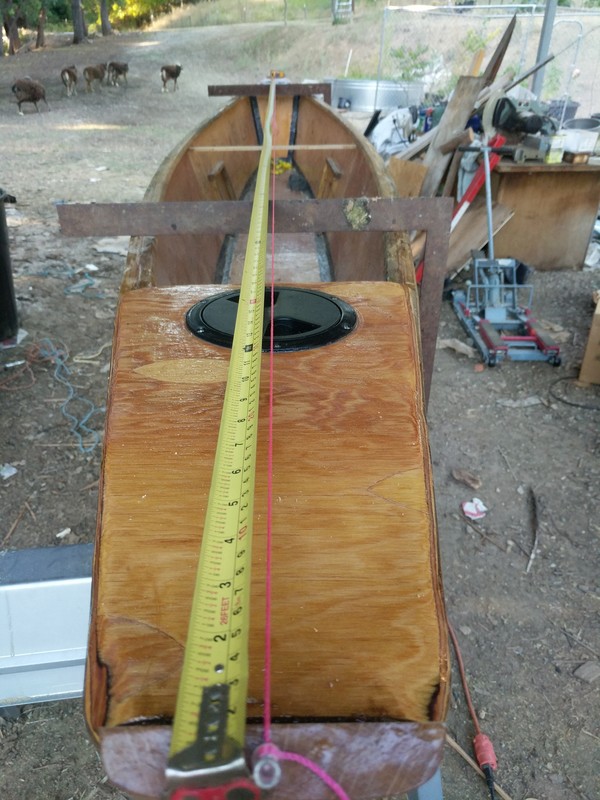 The booms for the outriggers will attach to wooden beams that pass through the hull of the canoe. The
beams must be parallel to each other, and perpendicular to the centerline of the hull.
The booms for the outriggers will attach to wooden beams that pass through the hull of the canoe. The
beams must be parallel to each other, and perpendicular to the centerline of the hull.
Oh hey, the bulkhead covers are on.
Cut Once
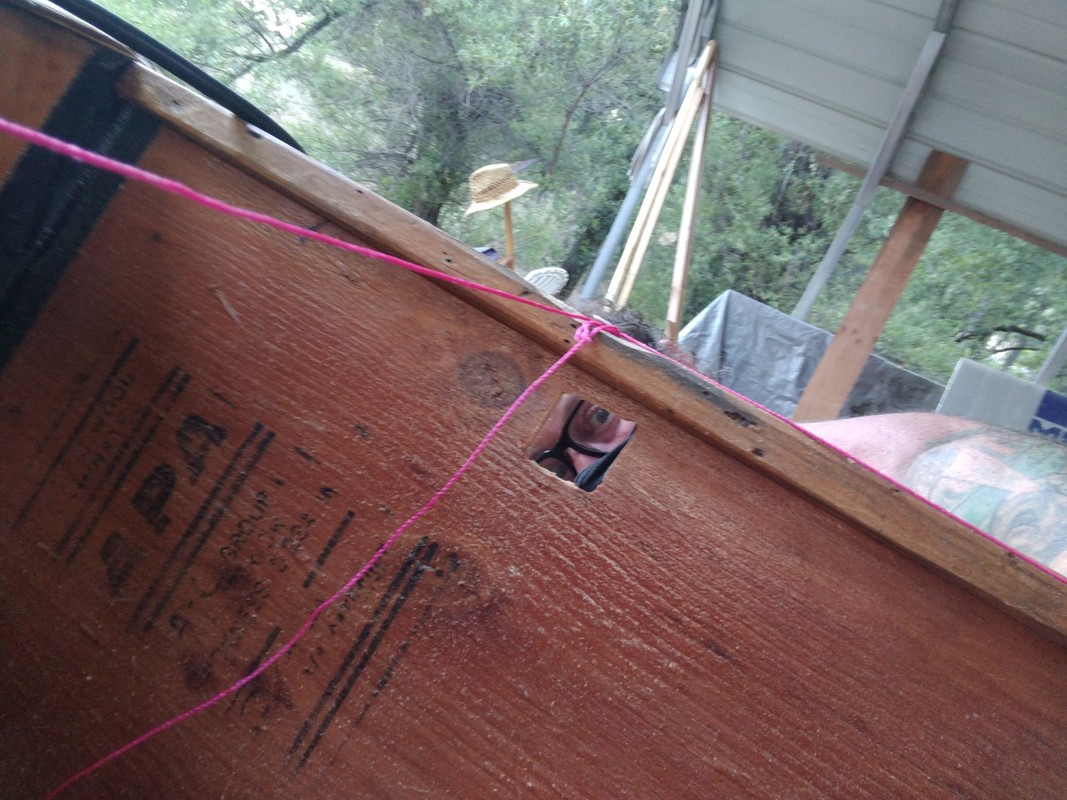 The boom support beams can't pass through the hull without cutting/carving holes in a perfectly good boat.
Measure Hella
The boom support beams can't pass through the hull without cutting/carving holes in a perfectly good boat.
Measure Hella
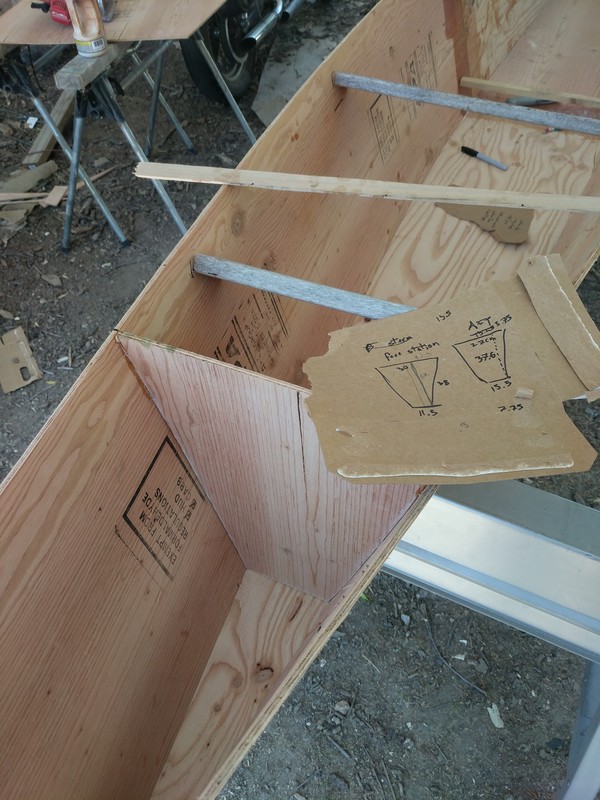
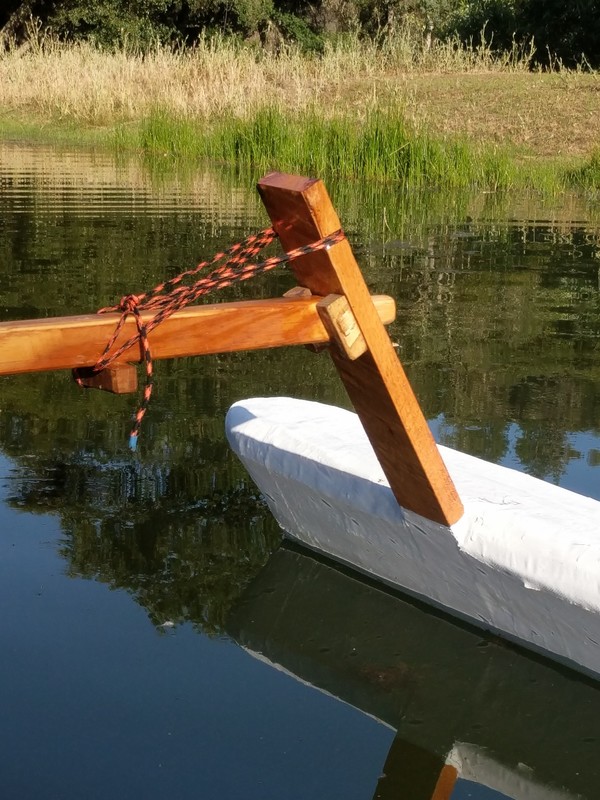
Strut and boom peg
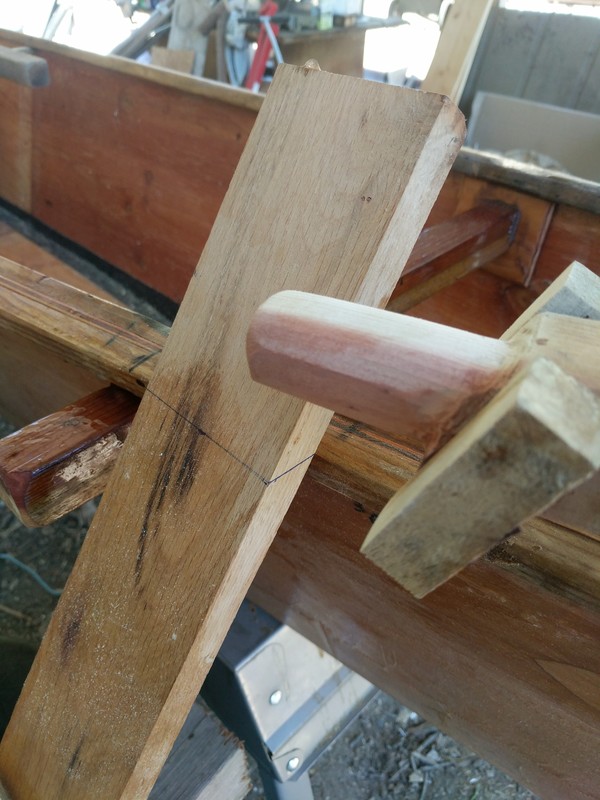 The outrigger boom ends with a peg that is inserted in a 30 degree socket
carved in the outrigger strut. The guiding lines have been drawn, time to start cutting.
The outrigger boom ends with a peg that is inserted in a 30 degree socket
carved in the outrigger strut. The guiding lines have been drawn, time to start cutting.
Connected!
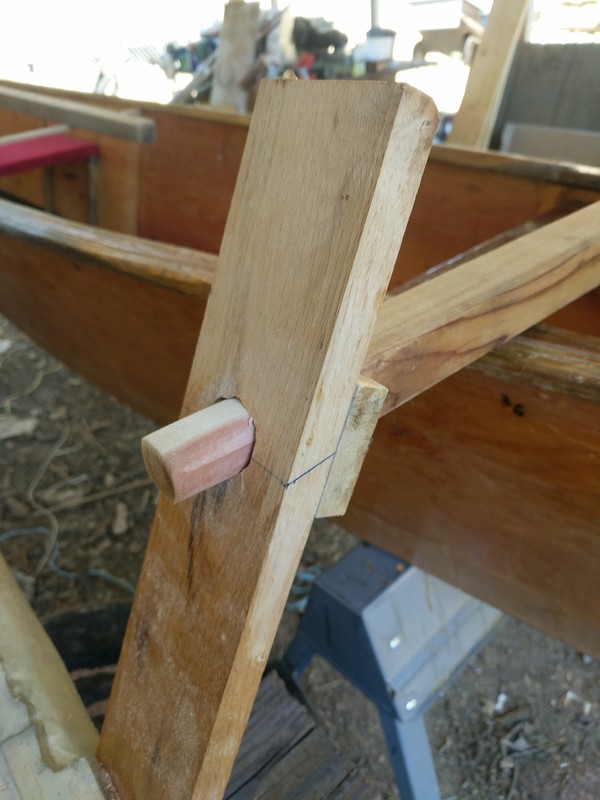 That was my first time drilling and carving and angled hole to match a carved peg. Then I did it again.
At this point, all that remains is the rope lashing to hold the struts to the booms, and the booms to the hull.
That was my first time drilling and carving and angled hole to match a carved peg. Then I did it again.
At this point, all that remains is the rope lashing to hold the struts to the booms, and the booms to the hull.
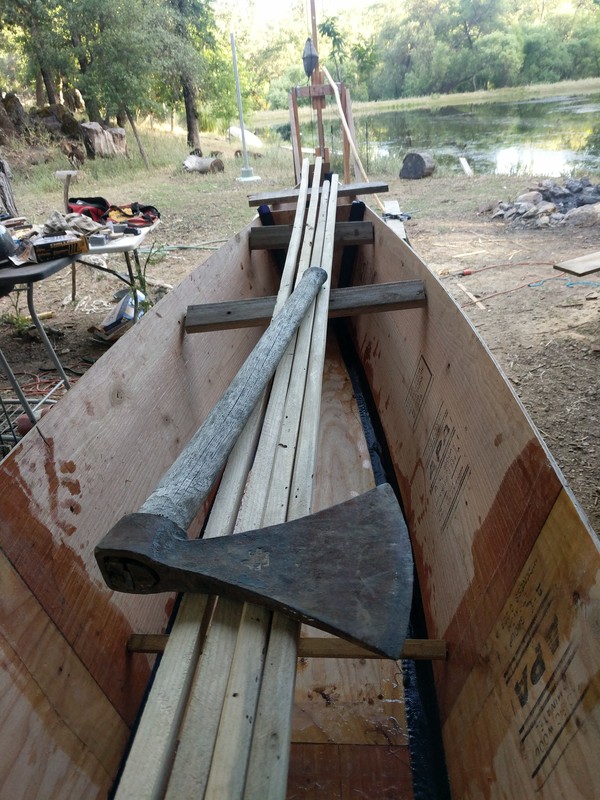
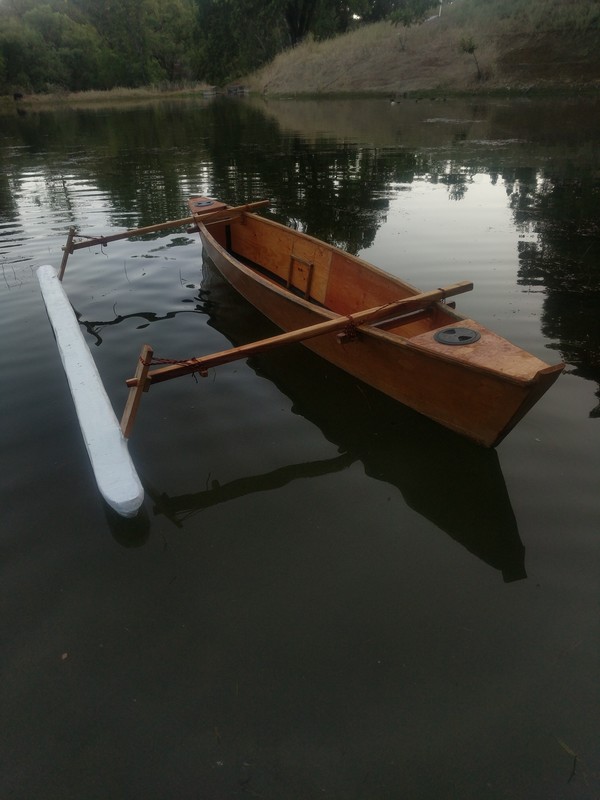
First paddle
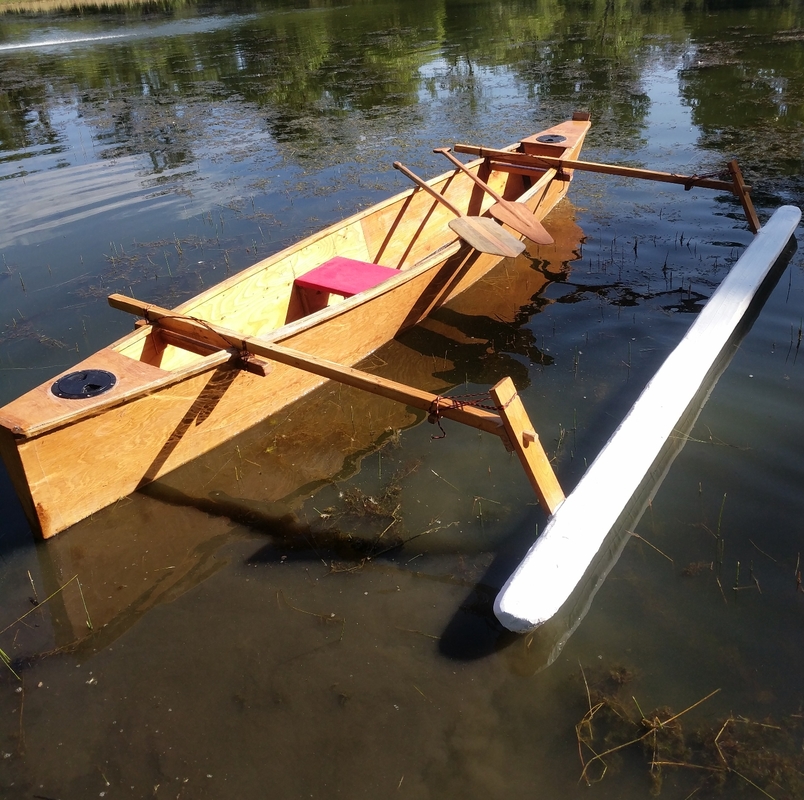 All connected and ready to go. Propulsion provided by the Battle Paddle and the Kintsugi Blade. In time, their tales
shall also be told.
All connected and ready to go. Propulsion provided by the Battle Paddle and the Kintsugi Blade. In time, their tales
shall also be told.
Front strut
Rear strut

Reflection
About 30 seconds after launch, the seat crumpled. Crack and I was sitting on a pile of bad engineering. My quest for a thin insanely light seat continues though. A new frame of foolishly thin oak is in the works.
Honestly, I didn't really need that seat. The floatation cushion that I brought along was used as a seat on the floor of the canoe. Aside from sitting, I also tested paddling while kneeling and standing. Kneeling on the cushion while being closer to the bow probably provided the quickest steering. Paddling while standing required squatting a bit to get the paddle blade in the water. It was a fine bit of cardio.
Other than the seat failure, the only other issue encountered was water getting into the aft bulkhead. After I had finished paddling, Woofsnaval spend the night in the water with only the tip of the bow on land. Somehow this resulted in water getting into the bulkhead; either by seeping through the hull or seeping in from the cockpit. The boat was quickly back in the shop for some drying, and some more epoxy.
As of this writing, Woofsnaval has received a coat of paint, and is being prepped for a trip to an actual lake. :)
Cheers,
jezra
edit: the adventure continues…