
Woofsnaval: rigged for Wind
When last we left Woofsnaval, the seat needed replacing, and it was the 2 week mark of what I was affectionately referring to as NaBoBuMo (National Boat Building Month), an event that runs from June 15 to July 15 inclusive. Yes, it is a 32 day long "month". The boat tracked extremely well at cruising speeds; once I was padding at speed, Woofy would travel in a fairly straight line with little deviation caused by paddling on one side of the boat. While this is a good trait when traveling from point A to point B, it also means that steering is limited to large arcs and making tight turns is out of the question.
Other than steering concerns, my co-pilot can only do the doggy-paddle and is incapable of helping me actually paddle the canoe. The solution to both issues, is to rig the vessel to be assisted with a sail.
Thus NaBoBuMo pupated into the glorious event now known as CaNaSaBoBuMo: California National Sail Boat Building Month!
To improve steering the boat needs a rudder, and the sail assist requires a sail and a leeboard.
Paint
 Before making any changes to Woofsnaval, I thought I'd add some class with a touch of paint. A new seat was also made, it is a slab of pine.
True story: that green matches
the ceiling of my bathroom :)
Before making any changes to Woofsnaval, I thought I'd add some class with a touch of paint. A new seat was also made, it is a slab of pine.
True story: that green matches
the ceiling of my bathroom :)
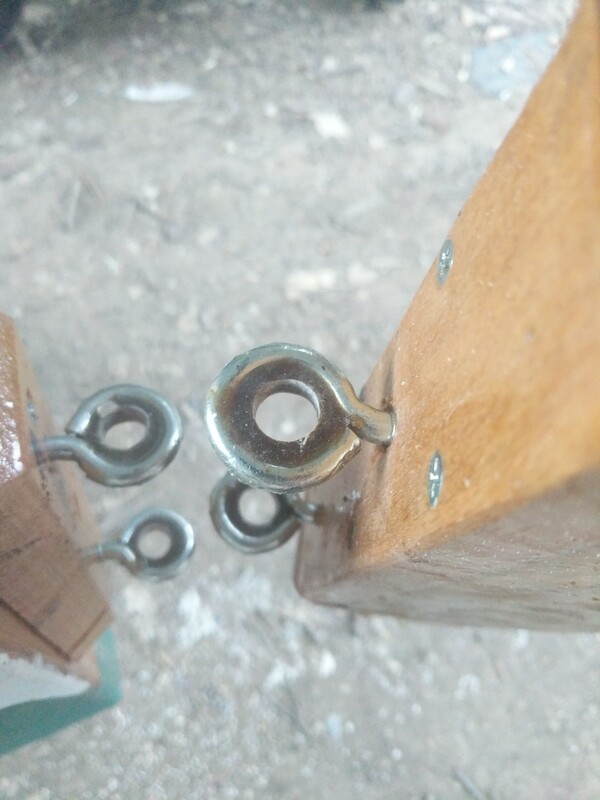
Rudder Axle Support
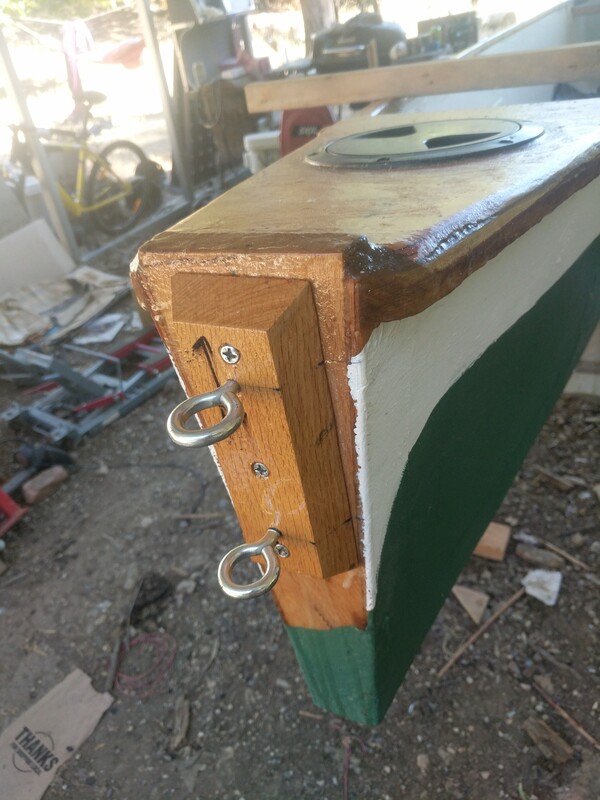 screwed and epoxied to the aft transom; the eyes are 10cm apart
Mast Partner
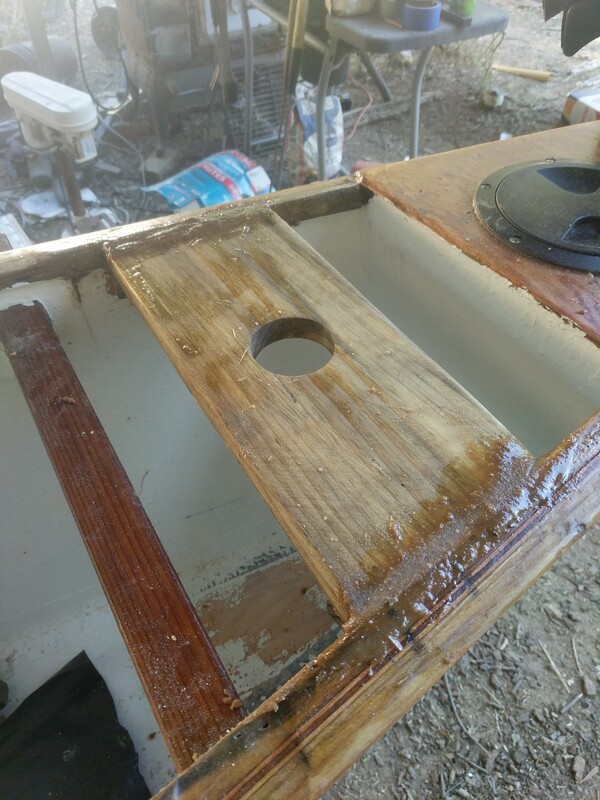 This would have been easier to install prior to installing the outrigger boom support. This is 2cm
pine from the local mill.
This would have been easier to install prior to installing the outrigger boom support. This is 2cm
pine from the local mill.
Clamped Mast Step
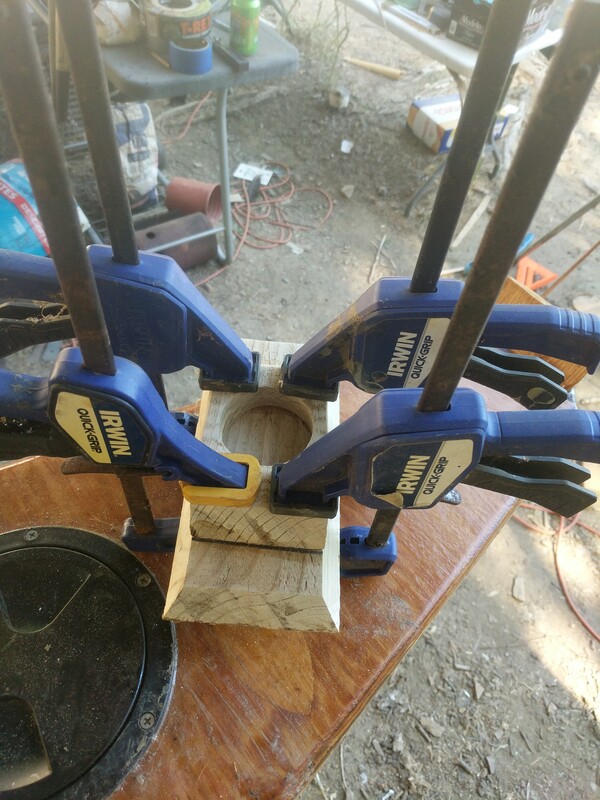 also pine from the local mill
Funky Rudder
 the rudder design was cut from 8mm ply? and coated with epoxy.
Rudder Box
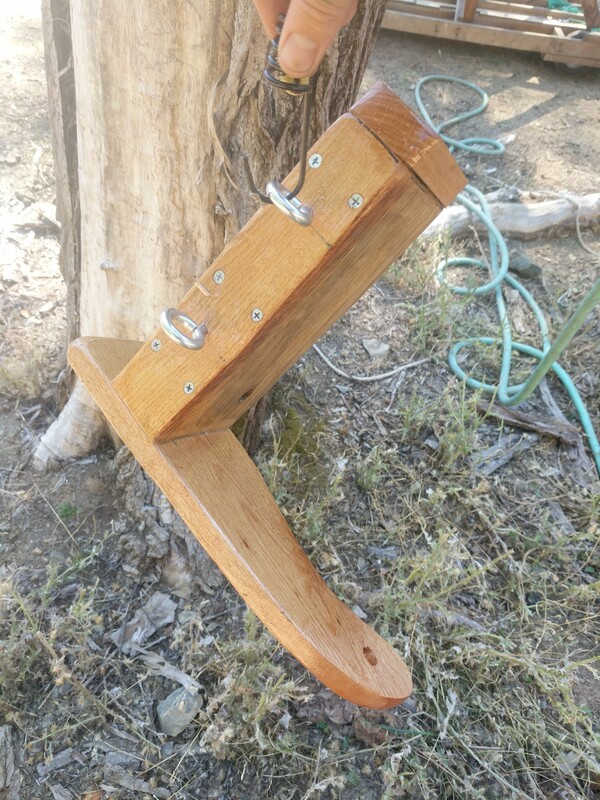 The rudder box is cassette style with a yoke for a Norwegian tiller. Pine and oak... from the local mill :)
Mast Step
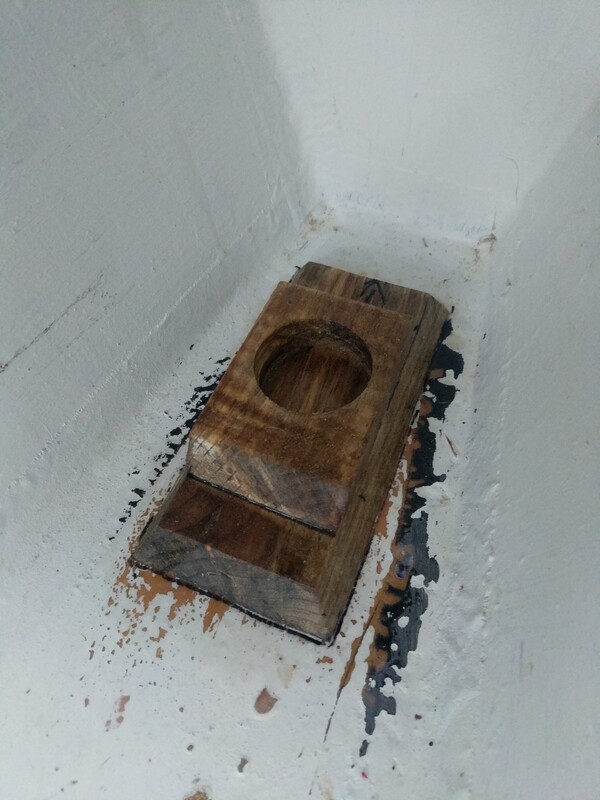 Once the mast partner was dry, I could test the mast position and determine the best location for the mast step.
Rudder Axle
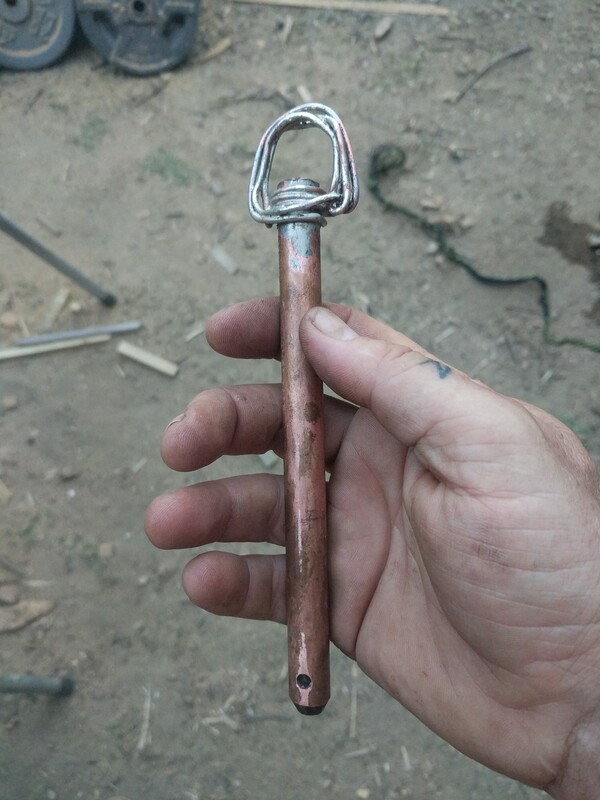 solid copper with a soldered copper "ring" on top, and a hole drilled in the bottom for a 'stopper' of 4mm cord.
Snug Axle Fit
 The rudder axle supports on the boat and the rudder box were filled with thickened
epoxy and once dry, drilled out to the exact size of the copper axle.
The rudder axle supports on the boat and the rudder box were filled with thickened
epoxy and once dry, drilled out to the exact size of the copper axle.
Assembled Rudder
 At this point the rudder works well for steering, but definitely needs a way for the user to retract the rudder.
fortunately, I included a protrusion on the top of the rudder that will eventually be controllable with a bit of cord.
At this point the rudder works well for steering, but definitely needs a way for the user to retract the rudder.
fortunately, I included a protrusion on the top of the rudder that will eventually be controllable with a bit of cord.
Norwegian
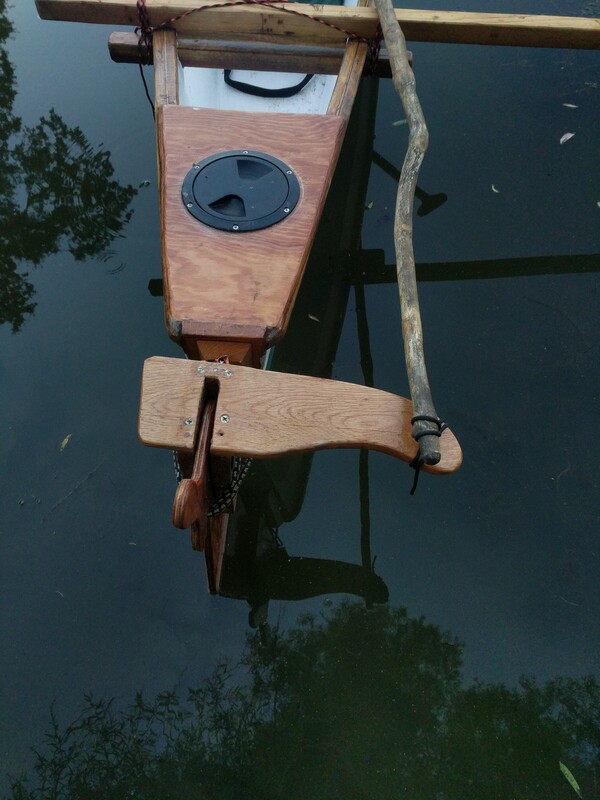 The best place for the pilot, is in the middle of the boat, and that is 2 meters from the rudder. A Norwegian tiller
makes it easy to operate the rudder from 2 meters away.
The best place for the pilot, is in the middle of the boat, and that is 2 meters from the rudder. A Norwegian tiller
makes it easy to operate the rudder from 2 meters away.
Rudder Kick Up Cord Stopper
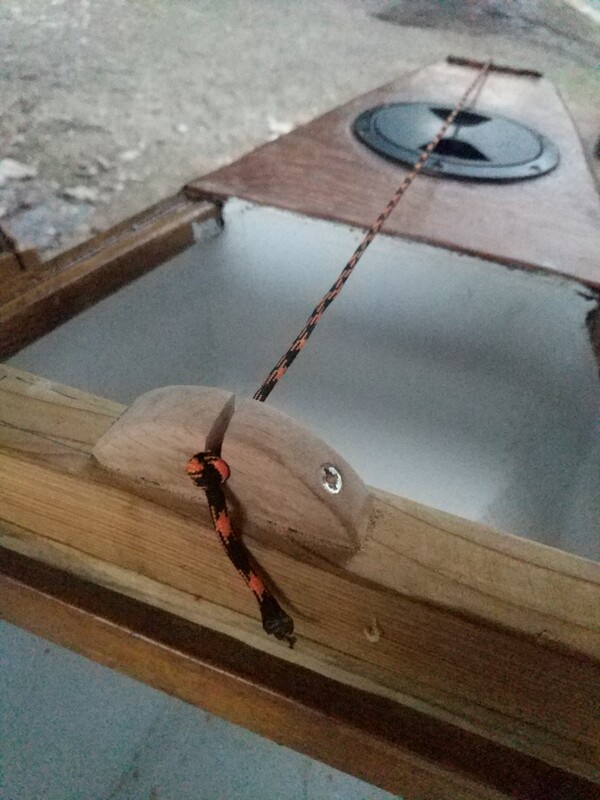 On the rear outrigger boom, an oak 'stopper' was attached. There is a figure of 8 knot in the rudder kick up cord,
and when I pull the cord, I stop the knot in this 'stopper'.
On the rear outrigger boom, an oak 'stopper' was attached. There is a figure of 8 knot in the rudder kick up cord,
and when I pull the cord, I stop the knot in this 'stopper'.
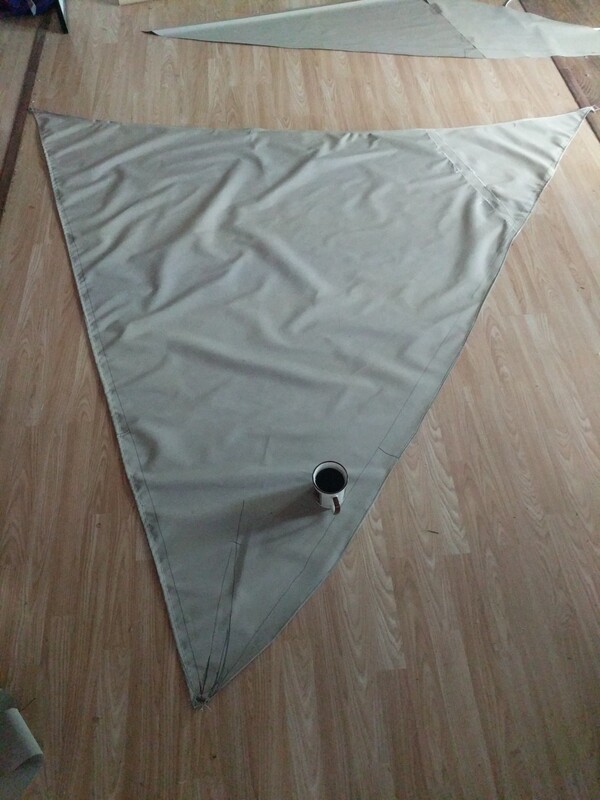
Sail Design
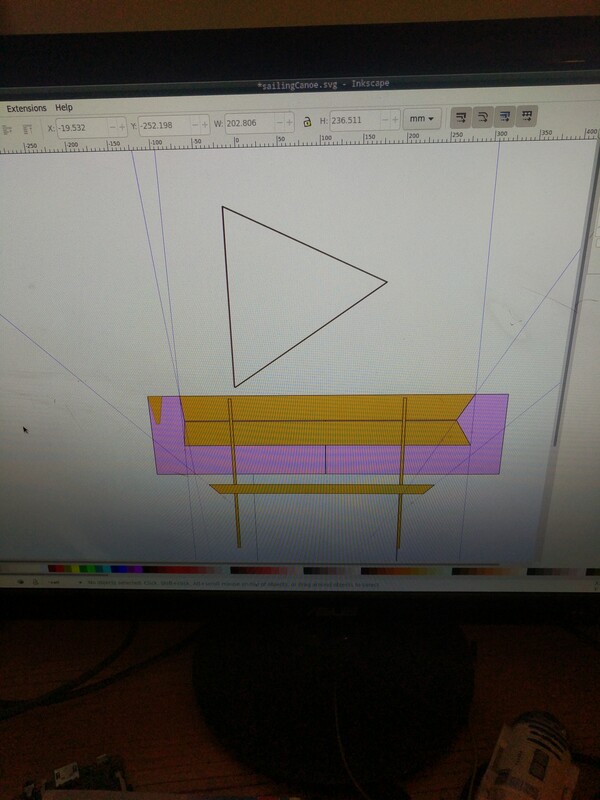 The basic shape of the sail was determined with copious amounts of measuring, and then the shape
was added to the Inkscape design file to give me a better idea of how the sail relates to the boat size.
The basic shape of the sail was determined with copious amounts of measuring, and then the shape
was added to the Inkscape design file to give me a better idea of how the sail relates to the boat size.
Mast, Spars, Sail Layout
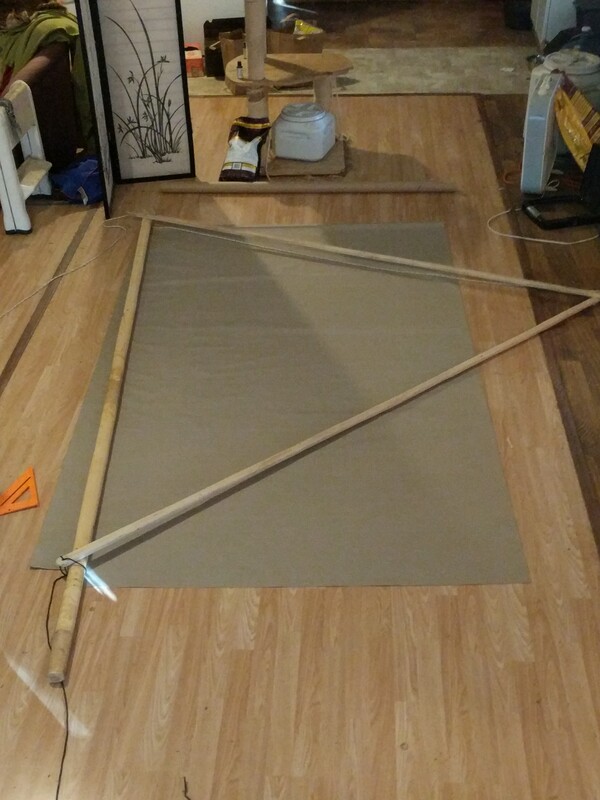 The mast is a laminate of 3 ripped strips of pine, the boom is a single piece of ripped pine. Both are
coated with spar varnish. Here the shape of the sail is aproximated with the spars, and the shape was traced to the
sail fabric.
The mast is a laminate of 3 ripped strips of pine, the boom is a single piece of ripped pine. Both are
coated with spar varnish. Here the shape of the sail is aproximated with the spars, and the shape was traced to the
sail fabric.
Shaped And Edge Sewn
 After tracing the basic sail outline, the design was adjusted to help the sail NOT be a flat plane. A sail needs, in a sense,
to be a cup that can fill with wind.
After tracing the basic sail outline, the design was adjusted to help the sail NOT be a flat plane. A sail needs, in a sense,
to be a cup that can fill with wind.
Sew A Dart
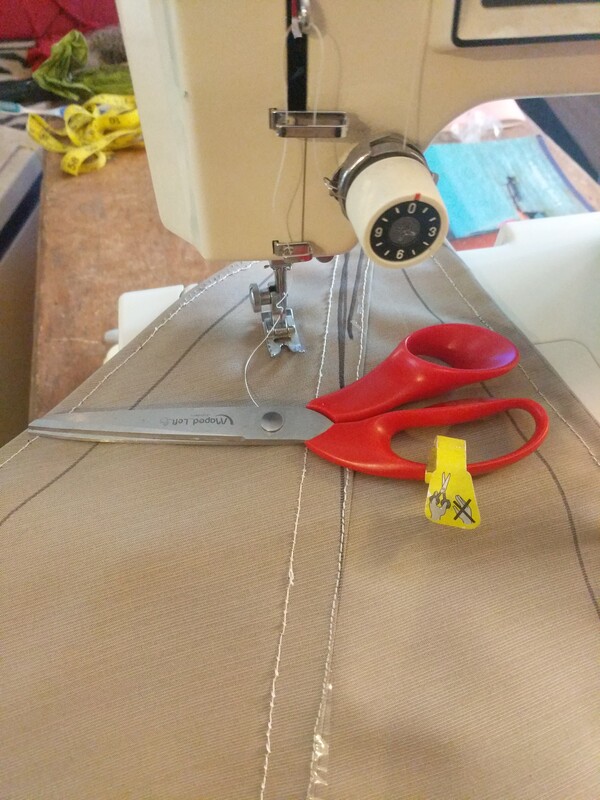 In the sail's tack, where the boom meets the mast, a dart was sewn to increase the depth of the sails "body". Wooowee, look at those hella sweet
sinister scissors!
In the sail's tack, where the boom meets the mast, a dart was sewn to increase the depth of the sails "body". Wooowee, look at those hella sweet
sinister scissors!
My sewing machine has seen better days, and I should probably invest in a more powerful machine that can more easily handle my sewing needs.
Pupper Approved
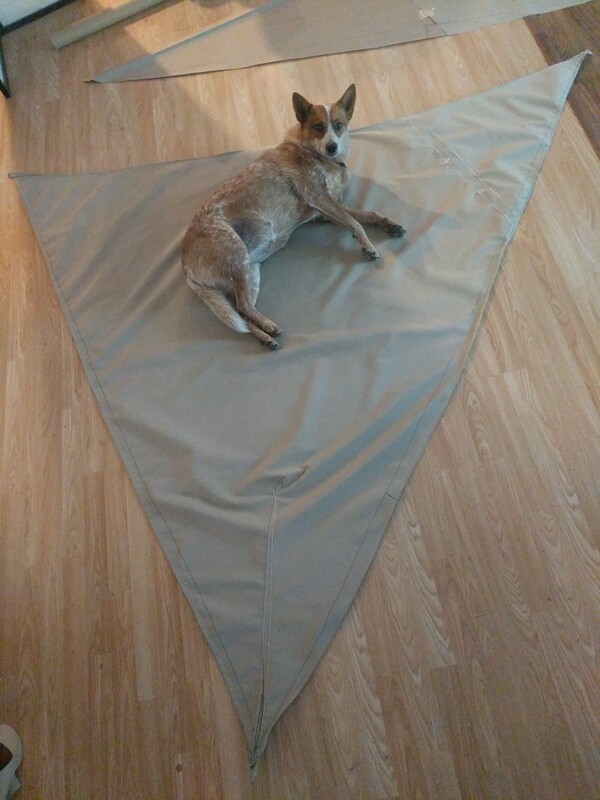 Even if she was capable of helping paddle the canoe, I'd still add a sail.
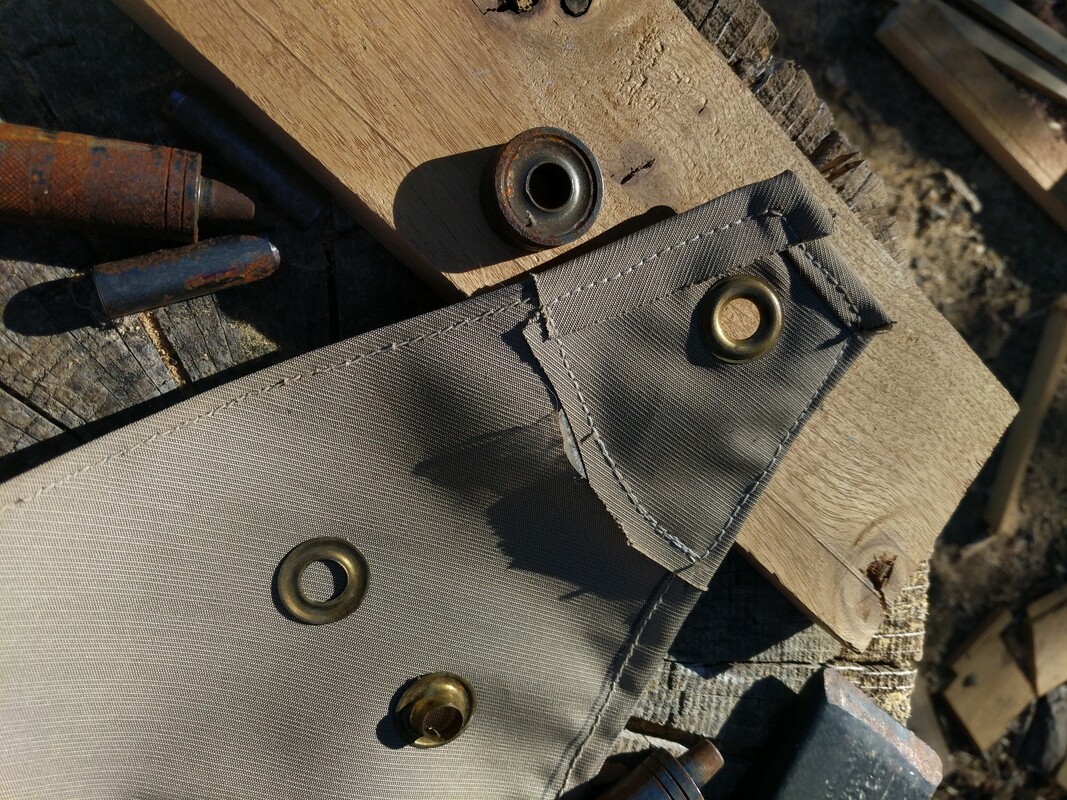
Reinforcemented Corners
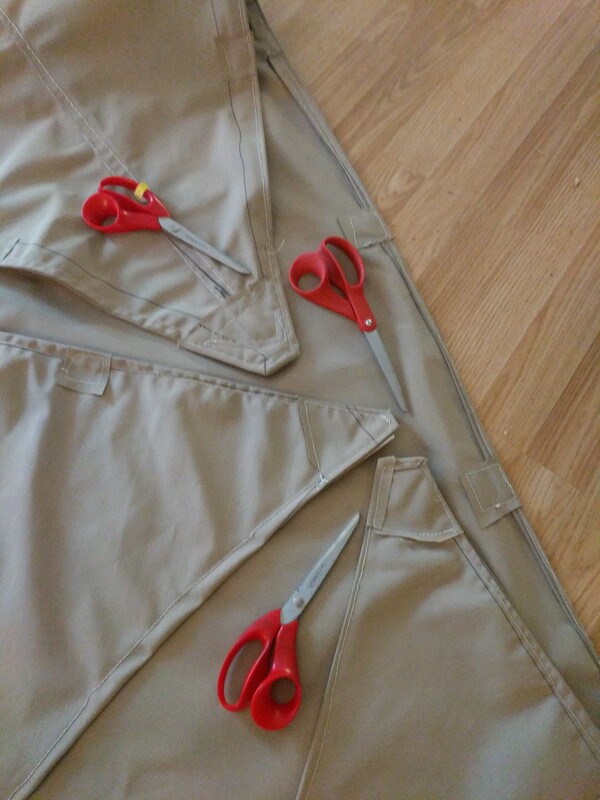 The corners of the sail were reinforced with extra material, and reinforcements where added where
grommets for sail lacing will be added. Hot damn, those are some beautiful sinister scissors!
The corners of the sail were reinforced with extra material, and reinforcements where added where
grommets for sail lacing will be added. Hot damn, those are some beautiful sinister scissors!
Finished Sail
 Adding brass grommets for lacing completed the sail, and some hasty lacing later, the sail was
attached to the mast and boom.
Adding brass grommets for lacing completed the sail, and some hasty lacing later, the sail was
attached to the mast and boom.
Hello July 15
It is the last day of CaNaSaBoBuMo.
The final piece of the boat has yet to be designed and crafted; the leeboard. Let the Rush begin!
Draw Lines
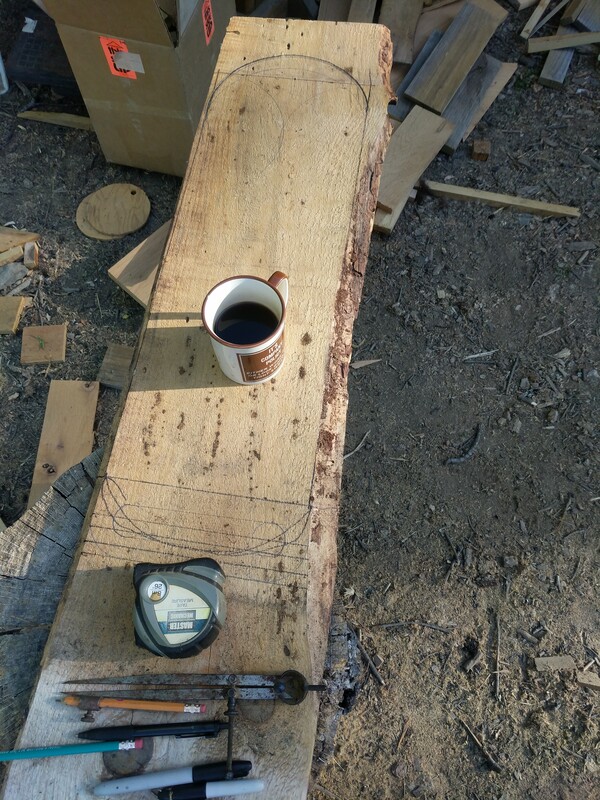 The leeboard will be 20cm wide, maybe 65ish tall, 2cm thick, and made from pine. There is a leeboard in that plank, I just need to extract it.
Extracted!
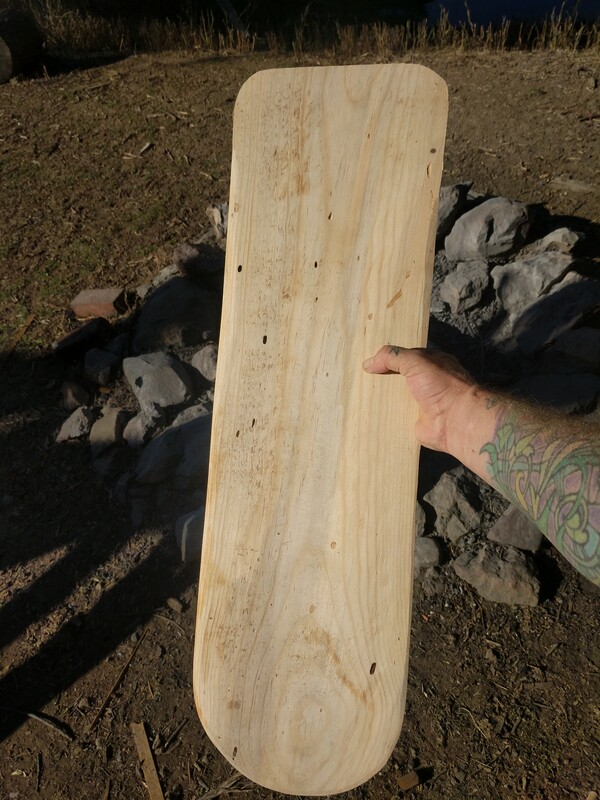 The shape was cut out, and then made more hydrodynamic with a belt sander
Peafowl Eggs
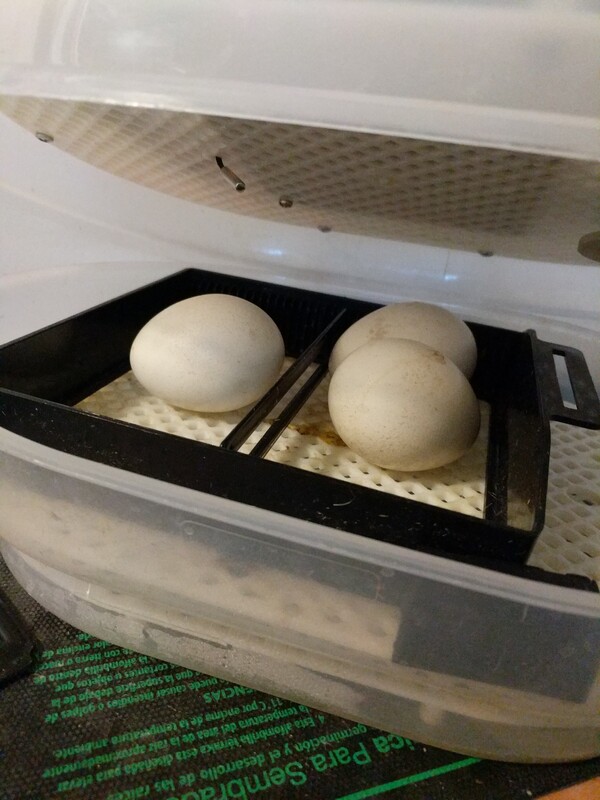 Yes, it is the last day of CaNaSaBoBuMo, but I've been trying to get peafowl eggs for hella days.
My friend called me and said that some eggs were available. The opportunity finally arrived; I jumped at the chance to
get some peafowl in the incubator.
Yes, it is the last day of CaNaSaBoBuMo, but I've been trying to get peafowl eggs for hella days.
My friend called me and said that some eggs were available. The opportunity finally arrived; I jumped at the chance to
get some peafowl in the incubator.
Leeboard Bracket
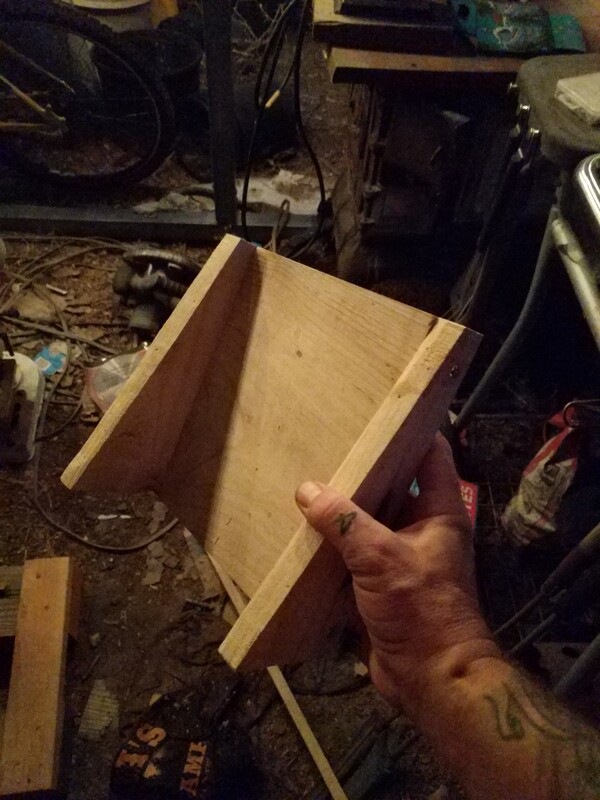 Measure measure measure, draw, cut, glue and screw. The bracket will be mounted about
70cm aft of the mast. This Should put the board in line with the sail's center of effort or just aft of the center of effort.
Measure measure measure, draw, cut, glue and screw. The bracket will be mounted about
70cm aft of the mast. This Should put the board in line with the sail's center of effort or just aft of the center of effort.
10:30PM
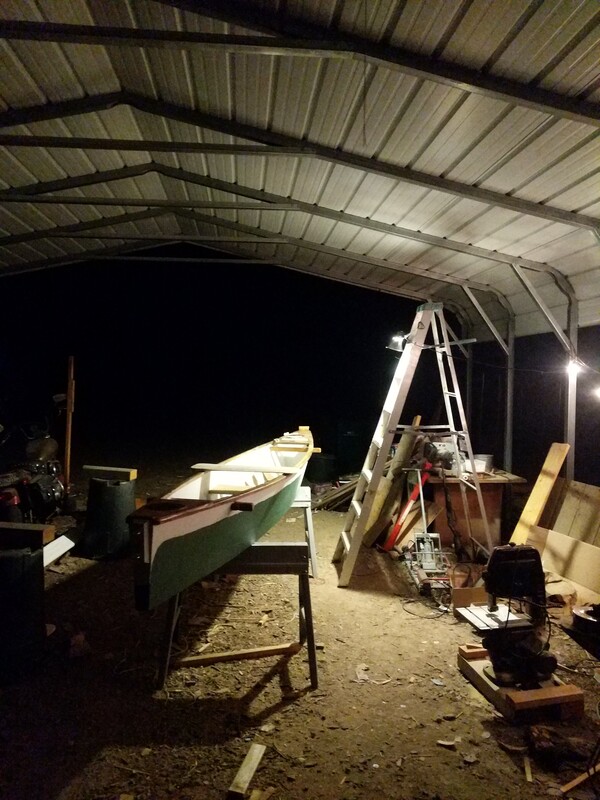 This was the scene at less than 2 hours remaining for CaNaSaBoBuMo. Fortunately, at this point there was
no longer a need to use power tools, and my single power source could be used to power some lighting.
This was the scene at less than 2 hours remaining for CaNaSaBoBuMo. Fortunately, at this point there was
no longer a need to use power tools, and my single power source could be used to power some lighting.
Interior Leeboard Bracket Supports
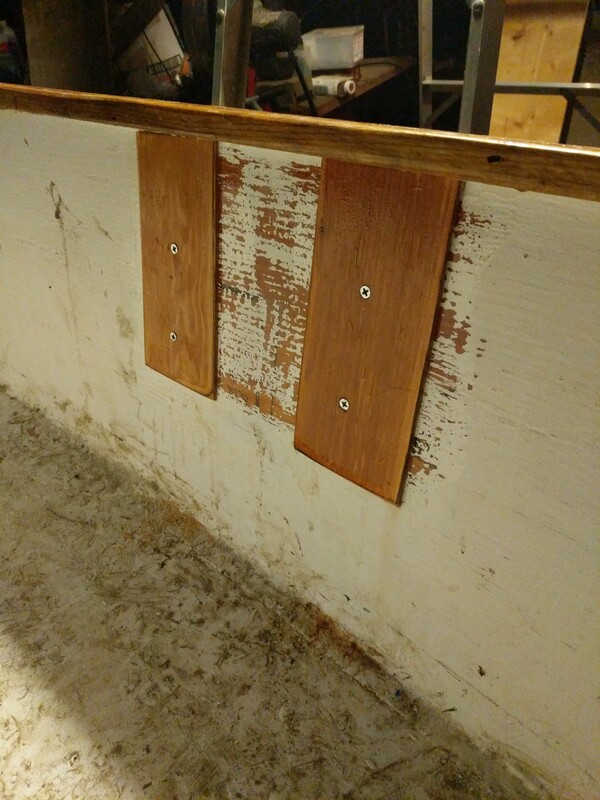 2 strips of 6mm ply were epoxied to the boat interior, and then screws were driven through the supports, the hull, and into
the bracket itself.
2 strips of 6mm ply were epoxied to the boat interior, and then screws were driven through the supports, the hull, and into
the bracket itself.
Bracket
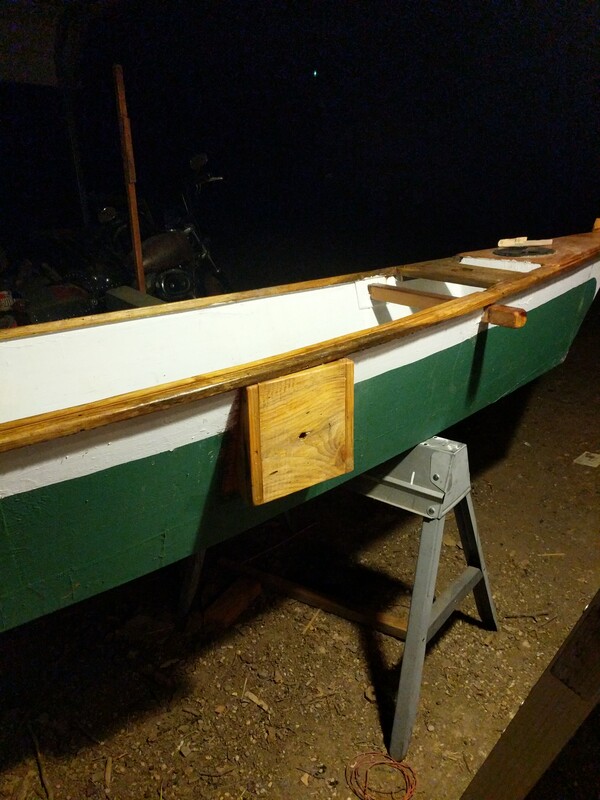 The bracket was covered with epoxy and screwed to the hull while the epoxy was still wet.
Perfect Angle
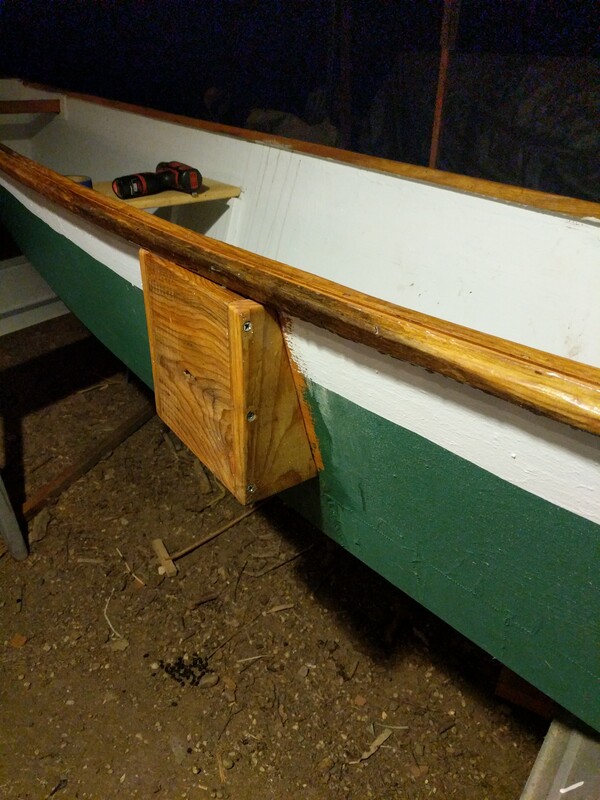 Thanks to a lot of measuring, the bracket will hold the leeboard in parallel with the direction of the boat, and not in parallel with the
arc of the side of the boat. At this point, all components have been made, and it was just a matter of waiting for the epoxy to dry and then assemble
the finished boat.
Thanks to a lot of measuring, the bracket will hold the leeboard in parallel with the direction of the boat, and not in parallel with the
arc of the side of the boat. At this point, all components have been made, and it was just a matter of waiting for the epoxy to dry and then assemble
the finished boat.
The Morning After
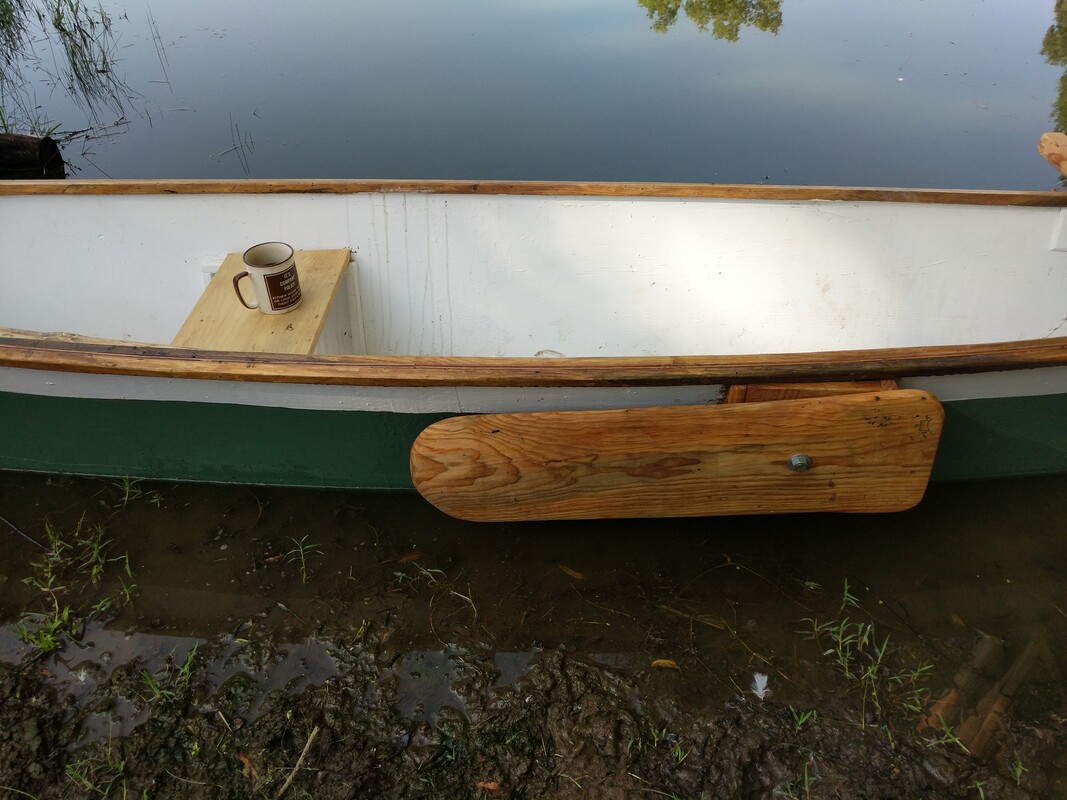 While sippin in the Morn, the boat components were assembled and tested on the water. Unlike the rudder, the leeboard is held in place
by friction, but the bolt holding the leeboard to the bracket is loose enough to all the board to kick up if it hits something under water. Adding a handle
to the leeboard sure would make it easier to move up and down.
While sippin in the Morn, the boat components were assembled and tested on the water. Unlike the rudder, the leeboard is held in place
by friction, but the bolt holding the leeboard to the bracket is loose enough to all the board to kick up if it hits something under water. Adding a handle
to the leeboard sure would make it easier to move up and down.
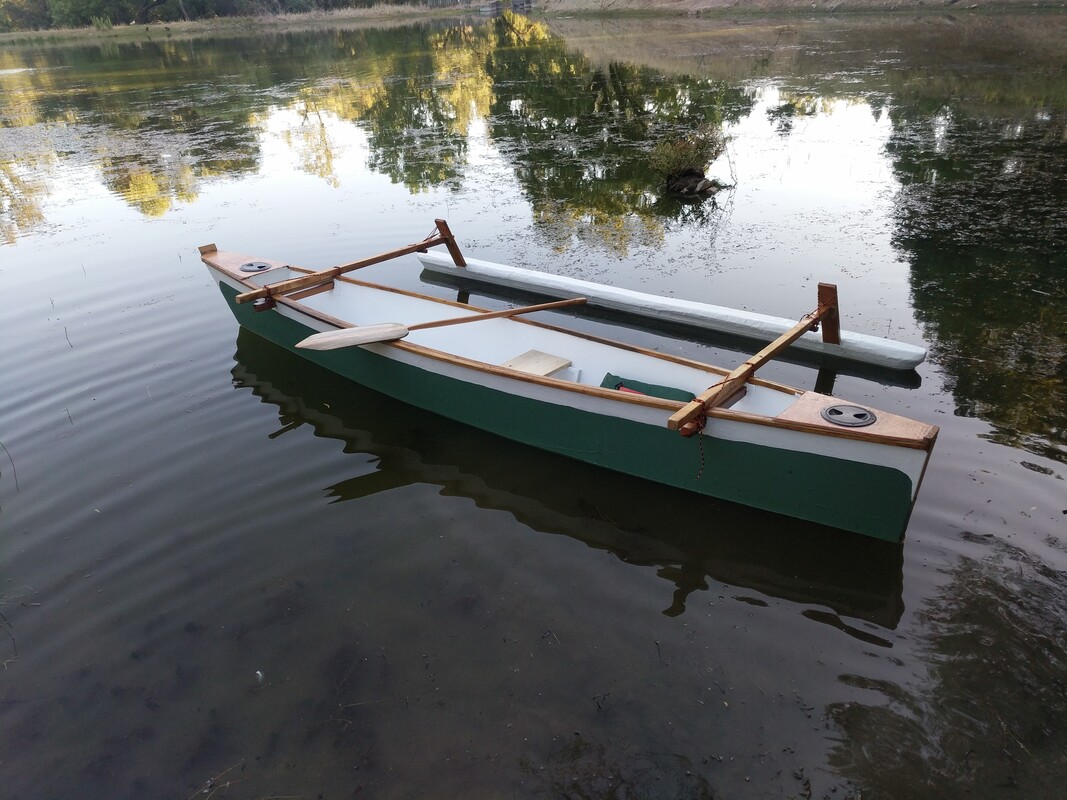
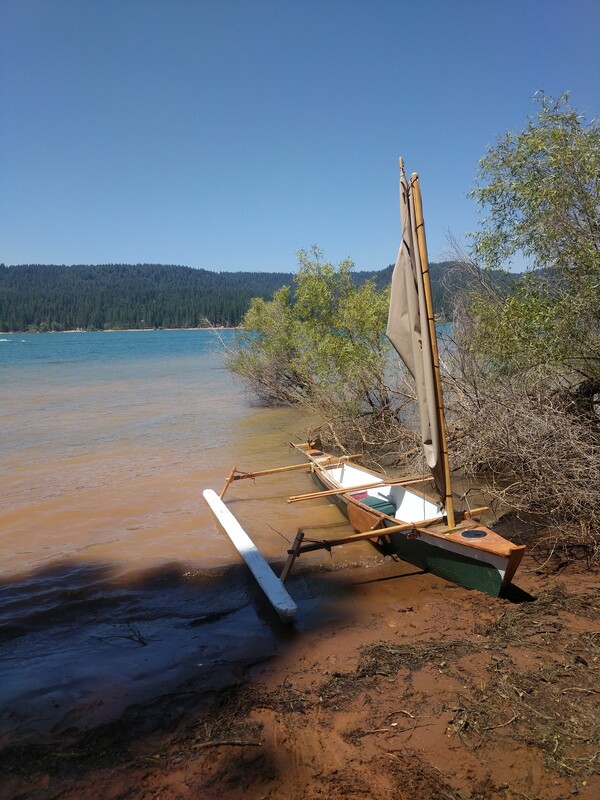
The Sail
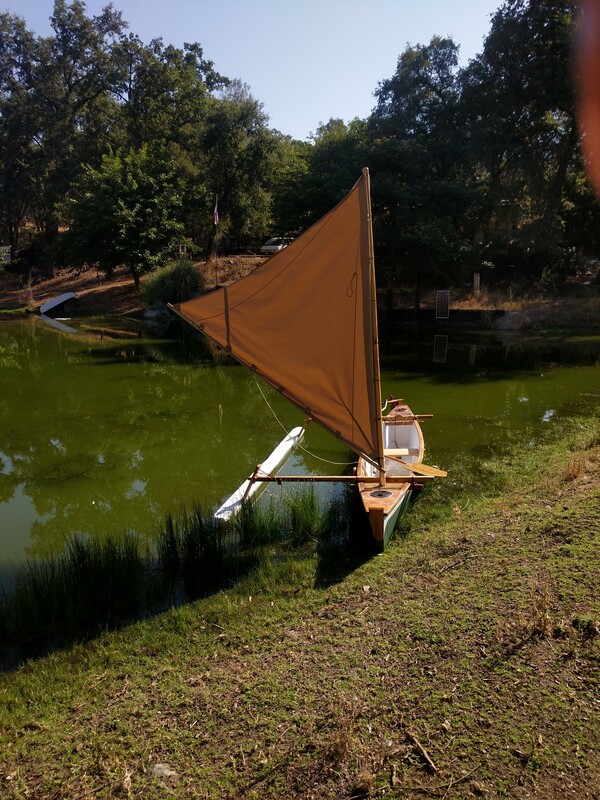 The sail is a crab claw, approximately 2.1 square meters (22 square feet) laced directly to the mast. A brailing line
allows me to pull the boom to the mast and essentially "fold up" the sail when catching the wind is not desired.
The sail is a crab claw, approximately 2.1 square meters (22 square feet) laced directly to the mast. A brailing line
allows me to pull the boom to the mast and essentially "fold up" the sail when catching the wind is not desired.
New Leeboard
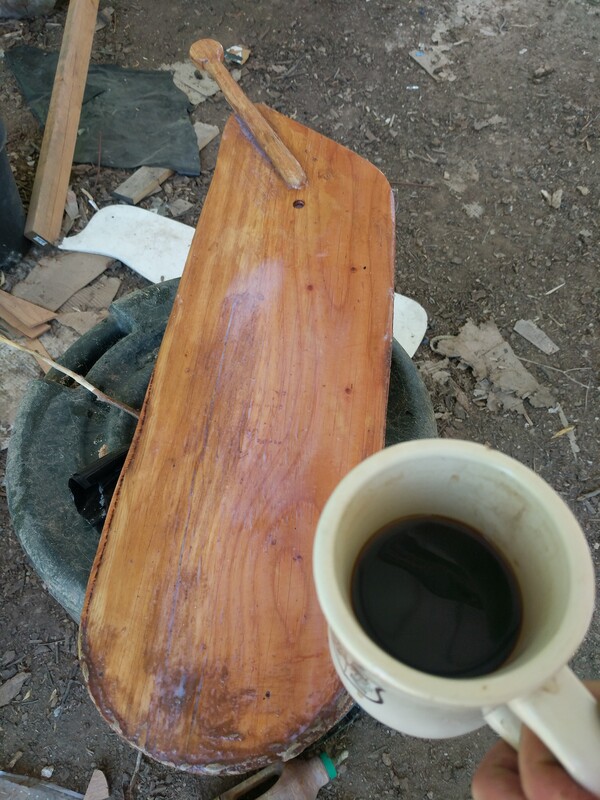 The original pine leeboard wasn't waterproofed enough and it absorbed a damaging amount of water. The board swelled, and warped a bit.
Drying the board resulted in a disasterous splitting that necessitated making a new board. Here is the new board: 8mm plywood with a handle of oak
from the local mill. The new board was *properly* waterproofed. A large plastic washer, cut from the lid of a pickle container, sits between the
leeboard and the mounting bracket. Where the board is most likely to scrape on something while sailing, thickened epoxy was applied
in a far from smooth fashion.
The original pine leeboard wasn't waterproofed enough and it absorbed a damaging amount of water. The board swelled, and warped a bit.
Drying the board resulted in a disasterous splitting that necessitated making a new board. Here is the new board: 8mm plywood with a handle of oak
from the local mill. The new board was *properly* waterproofed. A large plastic washer, cut from the lid of a pickle container, sits between the
leeboard and the mounting bracket. Where the board is most likely to scrape on something while sailing, thickened epoxy was applied
in a far from smooth fashion.
A 3 Hour Tour
It was time for better test of the sail, and that can only be done at a lake with a steady breeze. The boat was disassembled and loading on the truck. Crap, the pine seat fell into the water and warped. Oh well, I don't really need a seat. 30ish miles later, I was signing a covid waiver at a boat launch on the local lake.
The boat was assembled on the rocky shore next to the boat launch, but I kept the sail and spars wrapped up and laying on the outrigger booms. There were a few other people on the rocky shore, about 25 feet away, and while that is a fairly safe distance, I really wanted to just get away. Not raising the sail probably saved me 1.5 minutes of being near people.
It was a hot day, and I really didn't want to deal with people. About a minute of paddling later, I found a nice secluded beach to land on, and finish the sail set up. I also took the opportunity to put on sun sceen and more appropriate sailing clothing. After some water and snacks, it was adventure time!
Second Stop
 Like most beaches at the lake this one is mostly clay, and there were plenty of branches for playing fetch. For the most part the "adventure" consisted of
sailing/paddling from beach to beach where there would be games of fetch, and snacks. :)
Like most beaches at the lake this one is mostly clay, and there were plenty of branches for playing fetch. For the most part the "adventure" consisted of
sailing/paddling from beach to beach where there would be games of fetch, and snacks. :)
Third Stop
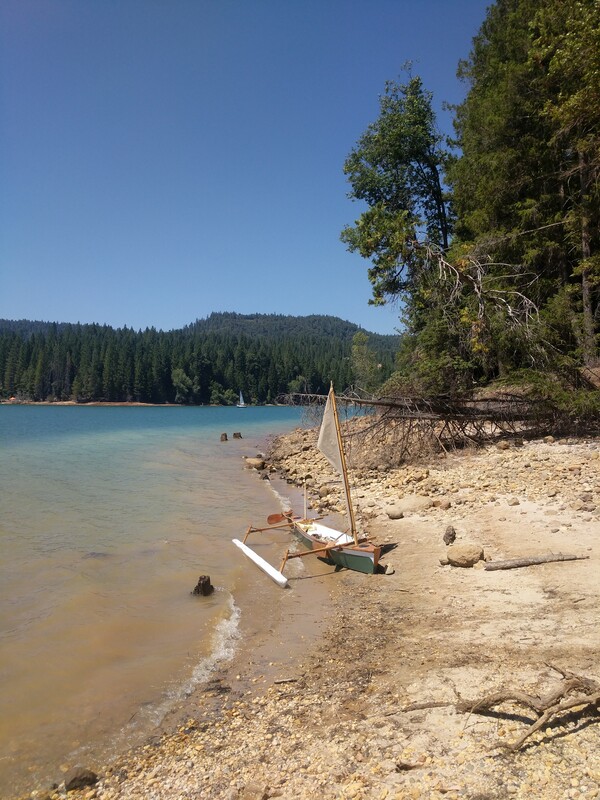 This beach was clay and rocks. There were some tree stumps in the water around this beach. Although it wasn't my favorite stop, there
was plenty of fetch to be played.
This beach was clay and rocks. There were some tree stumps in the water around this beach. Although it wasn't my favorite stop, there
was plenty of fetch to be played.
More Sailing
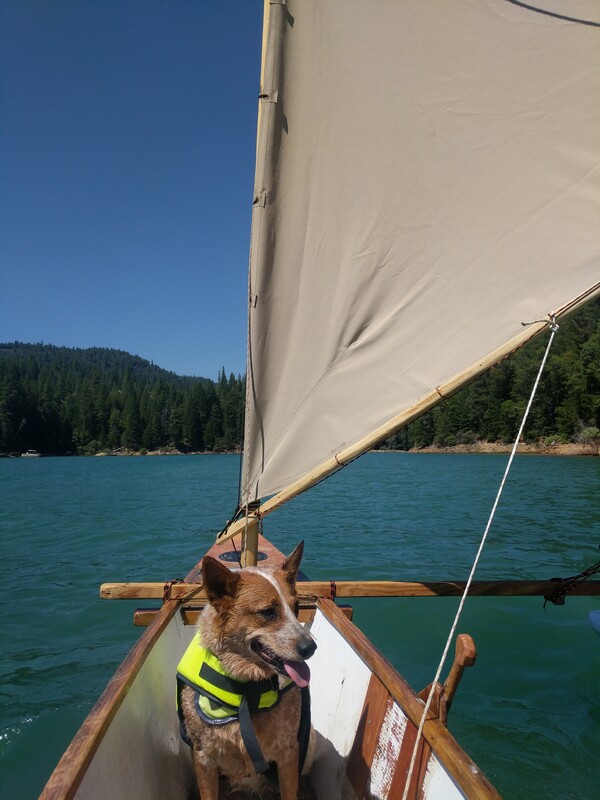 Up until now, we had been staying fairly close to shore and stopping every few minutes. After double checking the flotation devices, I decided to
sail farther out and for an extended period of time. Kaylee got bored and started crying for me to let her just overboard. Pffffttttt not the middle of the lake bub!
Up until now, we had been staying fairly close to shore and stopping every few minutes. After double checking the flotation devices, I decided to
sail farther out and for an extended period of time. Kaylee got bored and started crying for me to let her just overboard. Pffffttttt not the middle of the lake bub!
The Last Stop
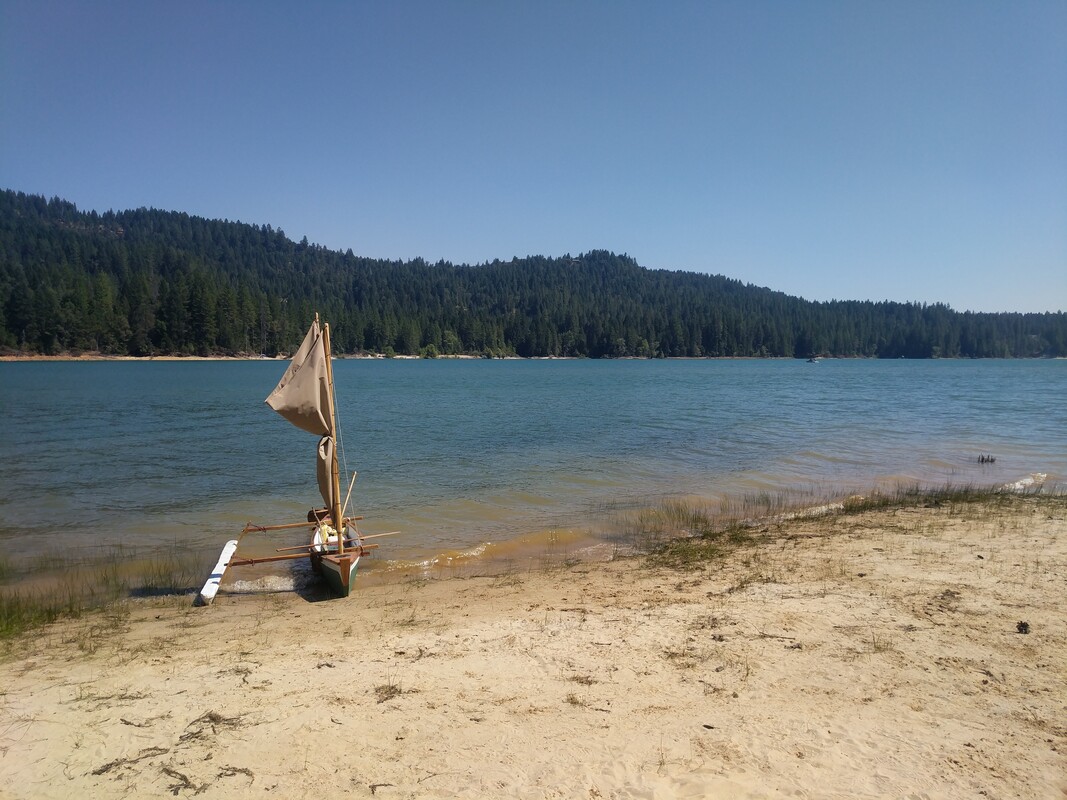
By far, this was the nicest beach of the trip. The clay was covered with a thick layer of soft sand; and Kaylee found a ball to play fetch with.
From this beach, the boat launch was to the windward, and it was finally time for the defining test of a sailboat: how well can it sail to windward?
Uh… OK? It was tough to tell how well Woofsnaval sails to windward, but it is definitely possible to do so, so I'm calling that a "win". Due to the nature of the vessel having an outrigger, there is the stable outrigger side and a tippy side. While heading back, there was a good wind pushing towards the tippy side, and it was strong enough to raise the outrigger out of the water. It was exhilarating and I quickly hiked out onto the outrigger boom to keep from capsizing.
Hot damn, what a fun day. Next time, I better remember to put sunscreen on my knees.
Back At Home
Although the boat performed wonderfully, there were a few things that could use some improving. Where the boom meets the mast, the boom should be pulled down to keep the sail taut. The rope that performs this function is called a down-haul, and I need to find a better way to tie off othe down-haul, and a better way to keep the boom from traveling in front of the mast.
When I'm in the boat, the bottom of the leeboard bracket is at water level and it wasn't uncommon for the bracket to hit choppy water and cause spray. Aside from splashing water into the inside of the boat, this makes for inefficient sailing. At the time of this writing, a few centimeters have been removed from the bottom of the bracket.
At one point during the trip, we sailed through the rough chop of a motorboat's wake and the bow of the boat went through a wave. The fore bulkhead provided excellent bouyancy, but there was now an uncomfortably amount of water in the cockpit and I didn't have a bailing scoop.
All in all, I'm super pleased with how Woofy behaves on the water.
Cheers,
jezra