
A ridge mount for Starlink
In February 2021, low latency internet, capable of handling a video conference,
finally arrived at my home in the form of Starlink
and their rev1_pre_production hardware model.
When the dish was permanently installed on the roof, there were zero obstructions between the dish and the satellites. However, once Spring came around the oaks leafed out, and I started to have obstructions from the North. Considering I want the best internet I can get, any obstruction is a bad obstruction.
So I made a second permanent mount, installed the Mount more Southernly, moved the dish to the new mount, routed 60' of the cable with sweet drip loops and a hefty amount of little brackets, plugged it all in and…
EVEN MORE OBSTRUCTIONS
The new location was clear to the North, but now there was an even worse problem from the South
and West. That my friends, is why one should always use the Starlink App to check a
location's obstructions before making a permanent mount.
According to the app, my best spot was in the middle of the roof ridge. Since I am allergic to intentionally putting a hole in a perfectly good roof, I opted for a non-penatrating roof ridge mount. Fortunately, most of the mount was hiding in my scrap pile. It just needed to be cut, hammered, cut some more, and then put together.
this is what I came up with :)
Paver Platforms
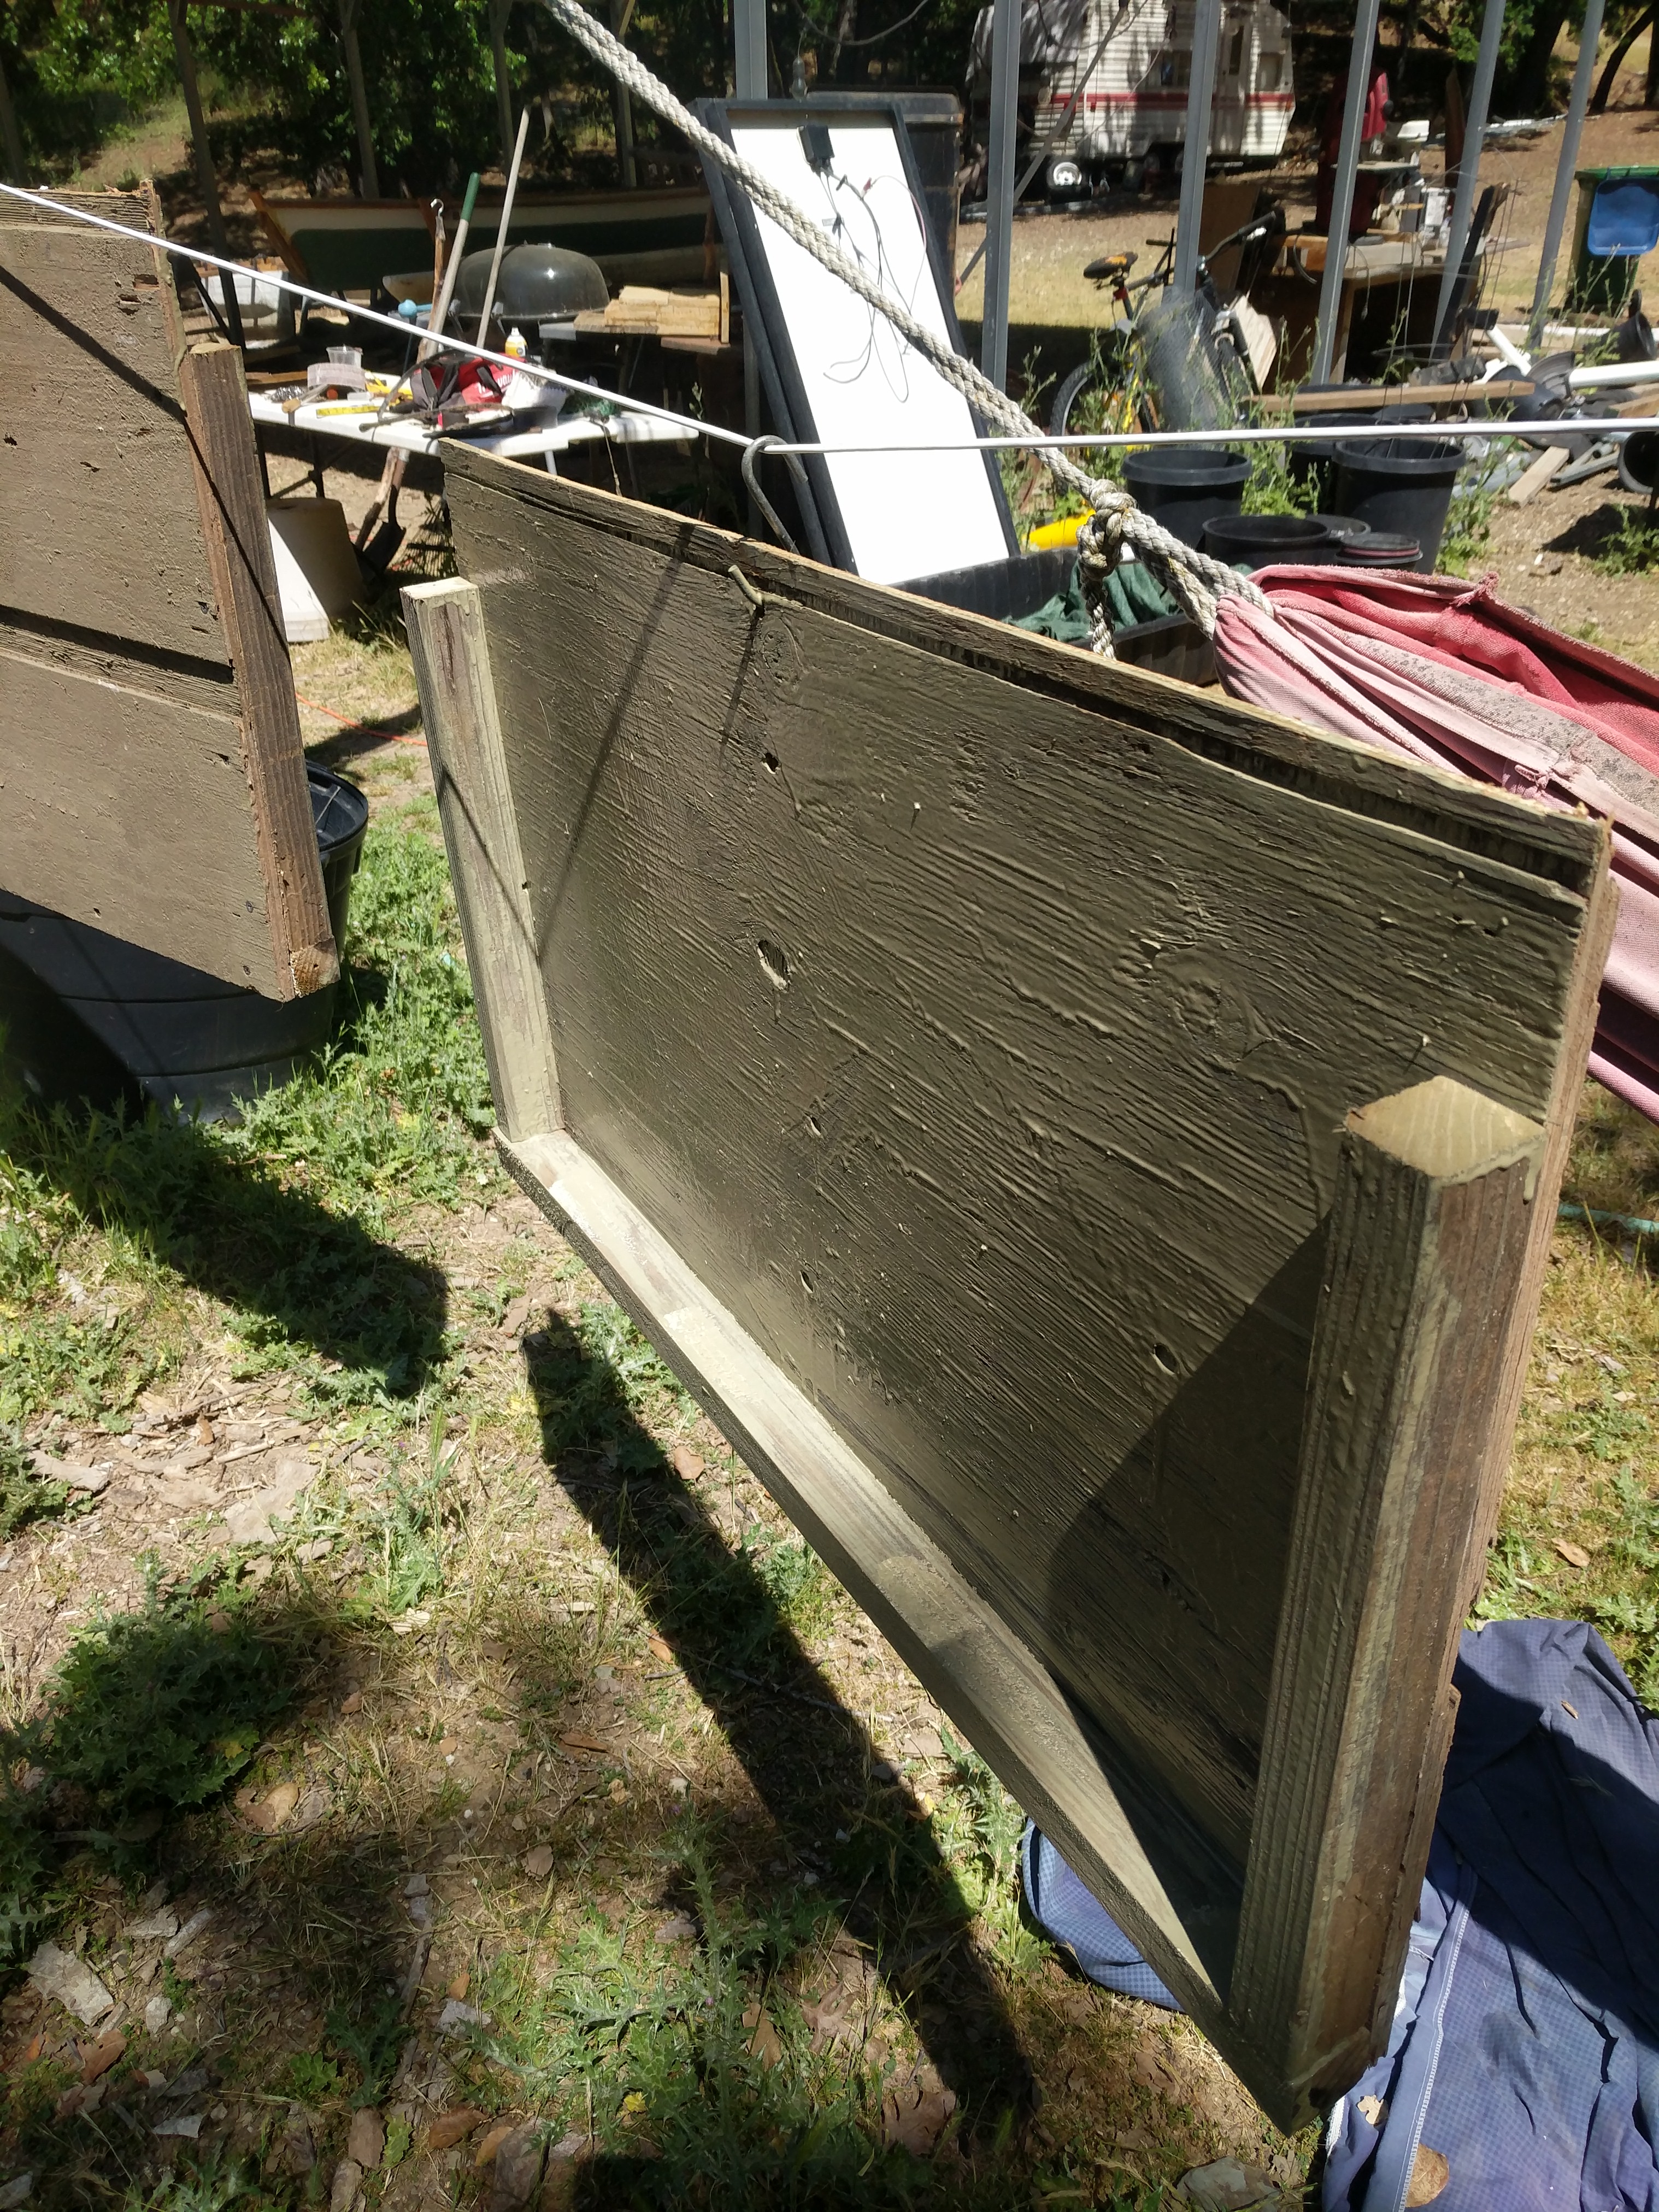 Each side of the ridge mount is uh... large enough to hold 4 pavers; shape and size are
both based on relative measurements of the pavers. Tape measure? pfffttt who needs it?
Each side of the ridge mount is uh... large enough to hold 4 pavers; shape and size are
both based on relative measurements of the pavers. Tape measure? pfffttt who needs it?
Footer Bracket
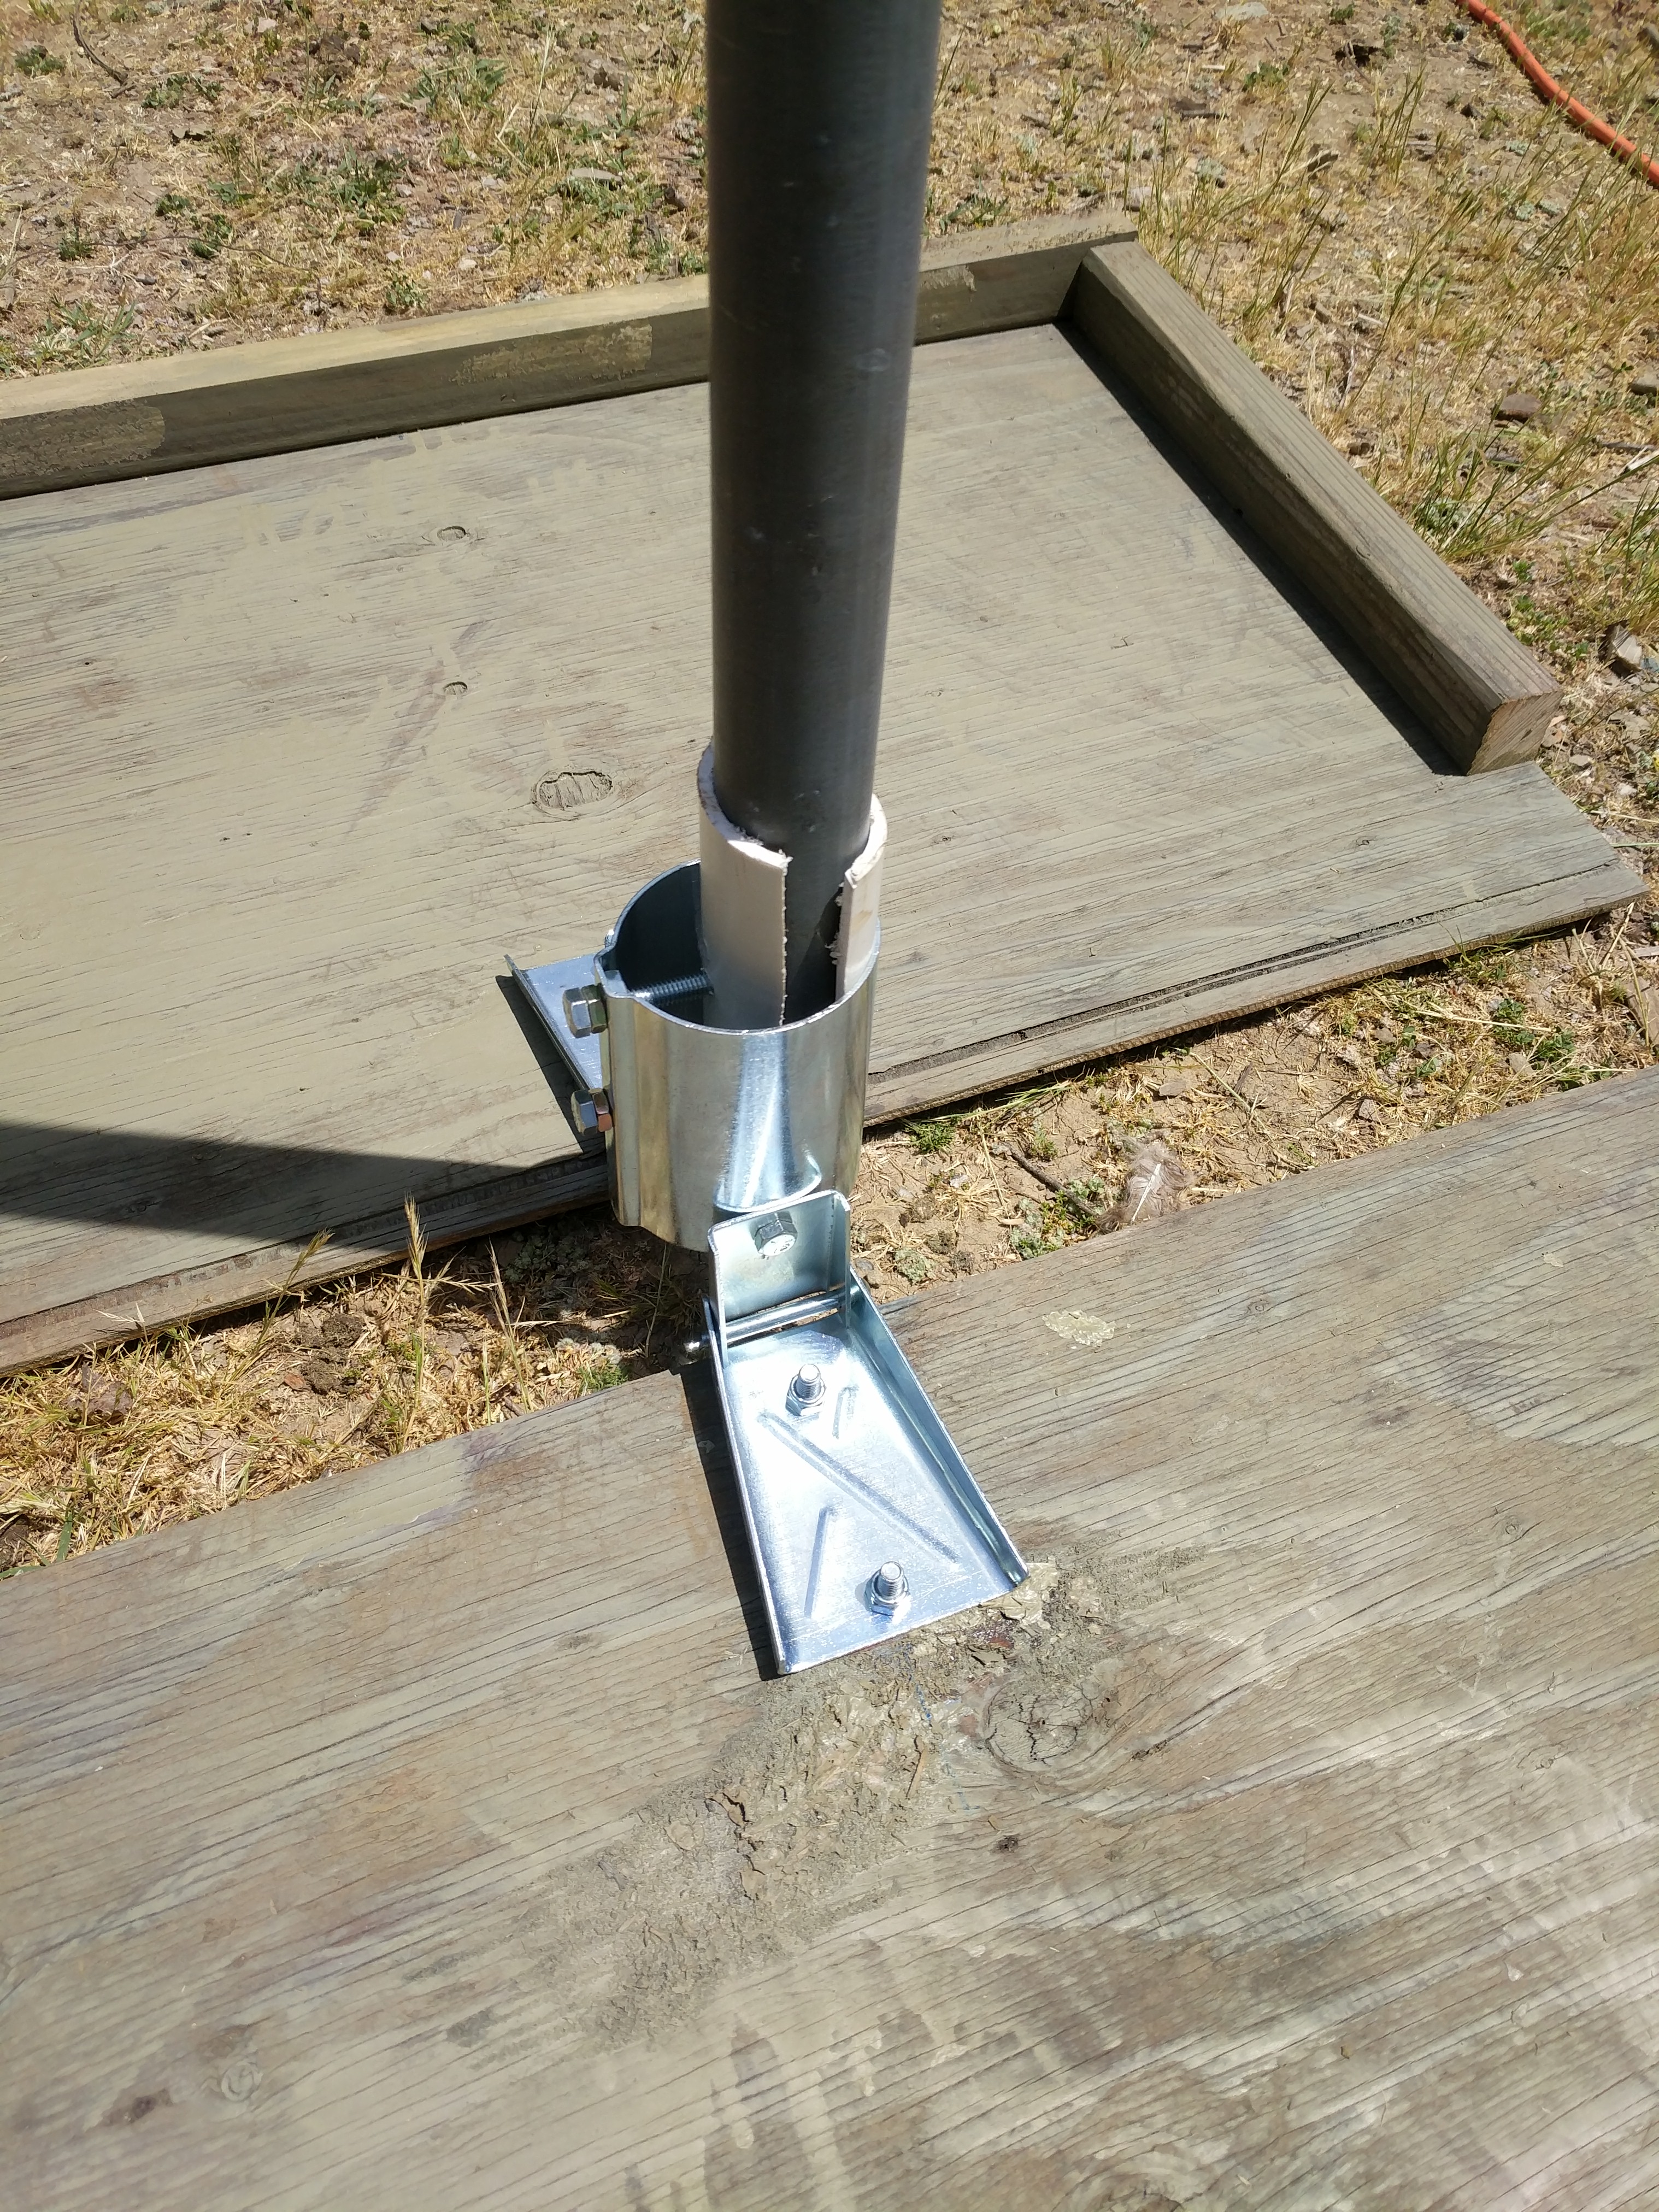 Woooweee, I should have gotten a bracket in a much smaller diameter. Some shims of PVC
keep the main pole in place.
Woooweee, I should have gotten a bracket in a much smaller diameter. Some shims of PVC
keep the main pole in place.
Rooftop Assembly
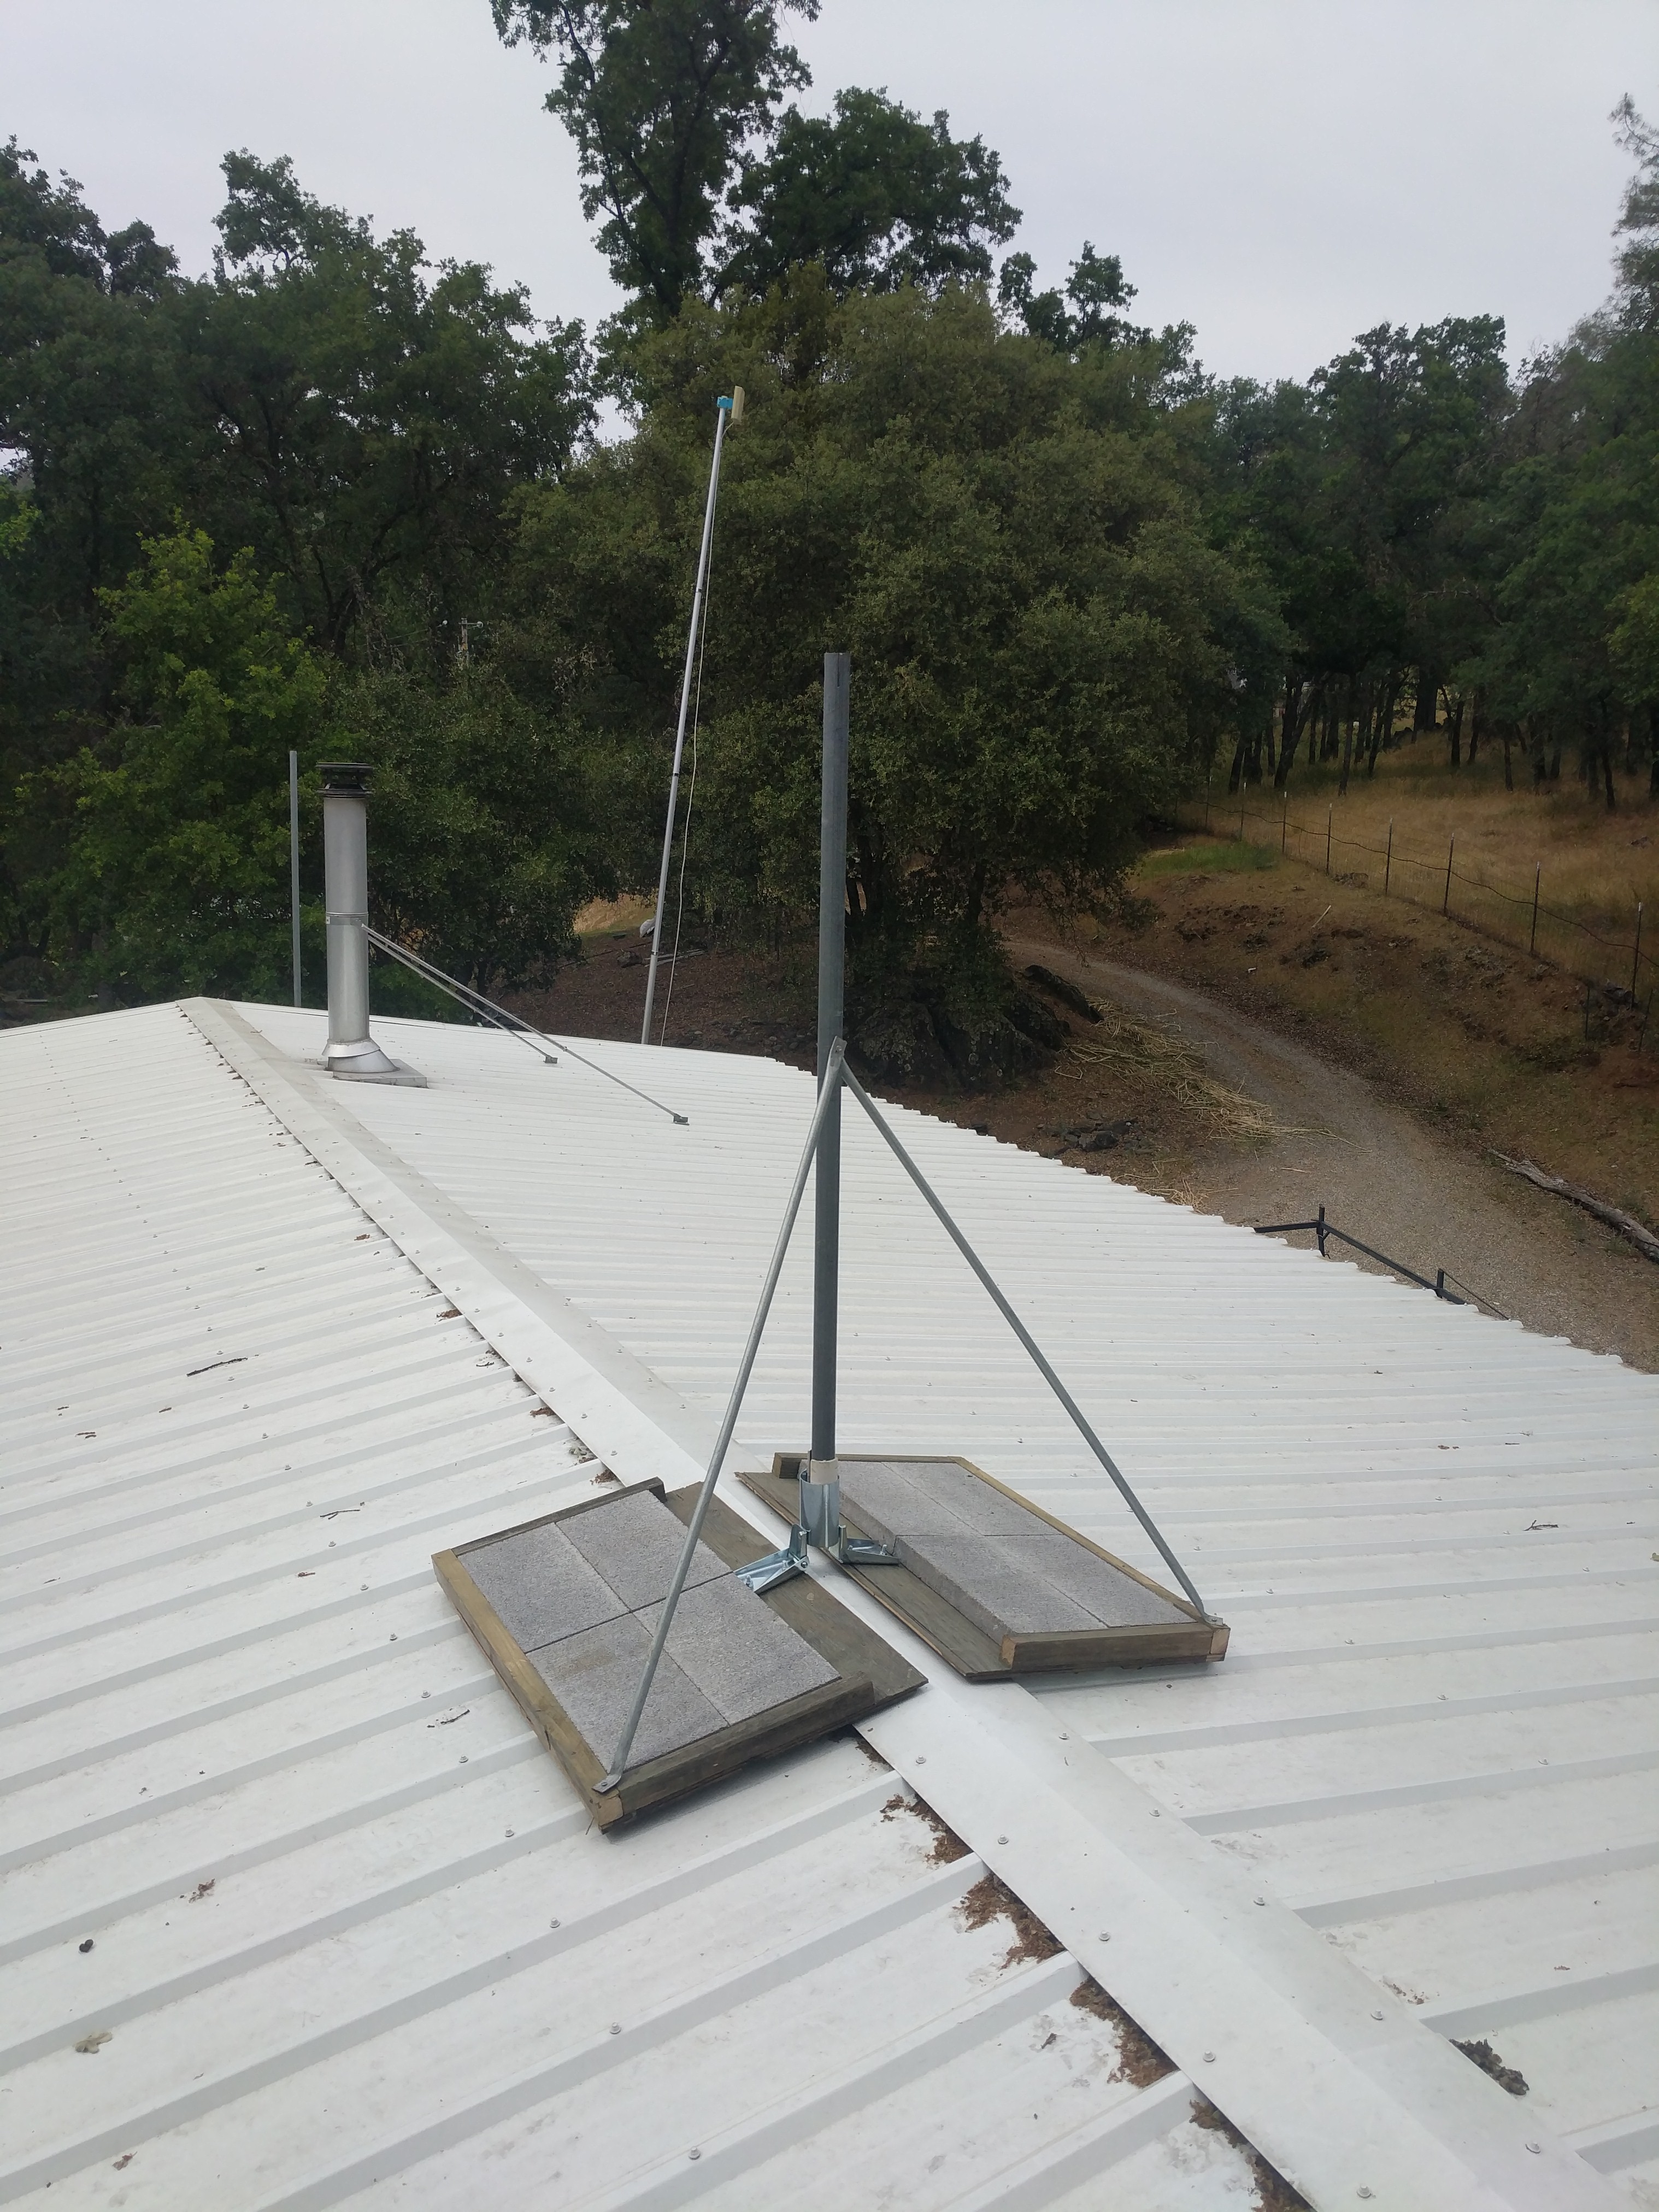 Once the pavers where holding everything in place, and I was pleased with the angles,
some lengths of ½" conduit were attached with self tapping
metal screws to stabilize the mount. In the background, left-to-right: the first dish mount, stove pipe,
mobile booster... and some oaks.
Once the pavers where holding everything in place, and I was pleased with the angles,
some lengths of ½" conduit were attached with self tapping
metal screws to stabilize the mount. In the background, left-to-right: the first dish mount, stove pipe,
mobile booster... and some oaks.
Fully Assembled Mount
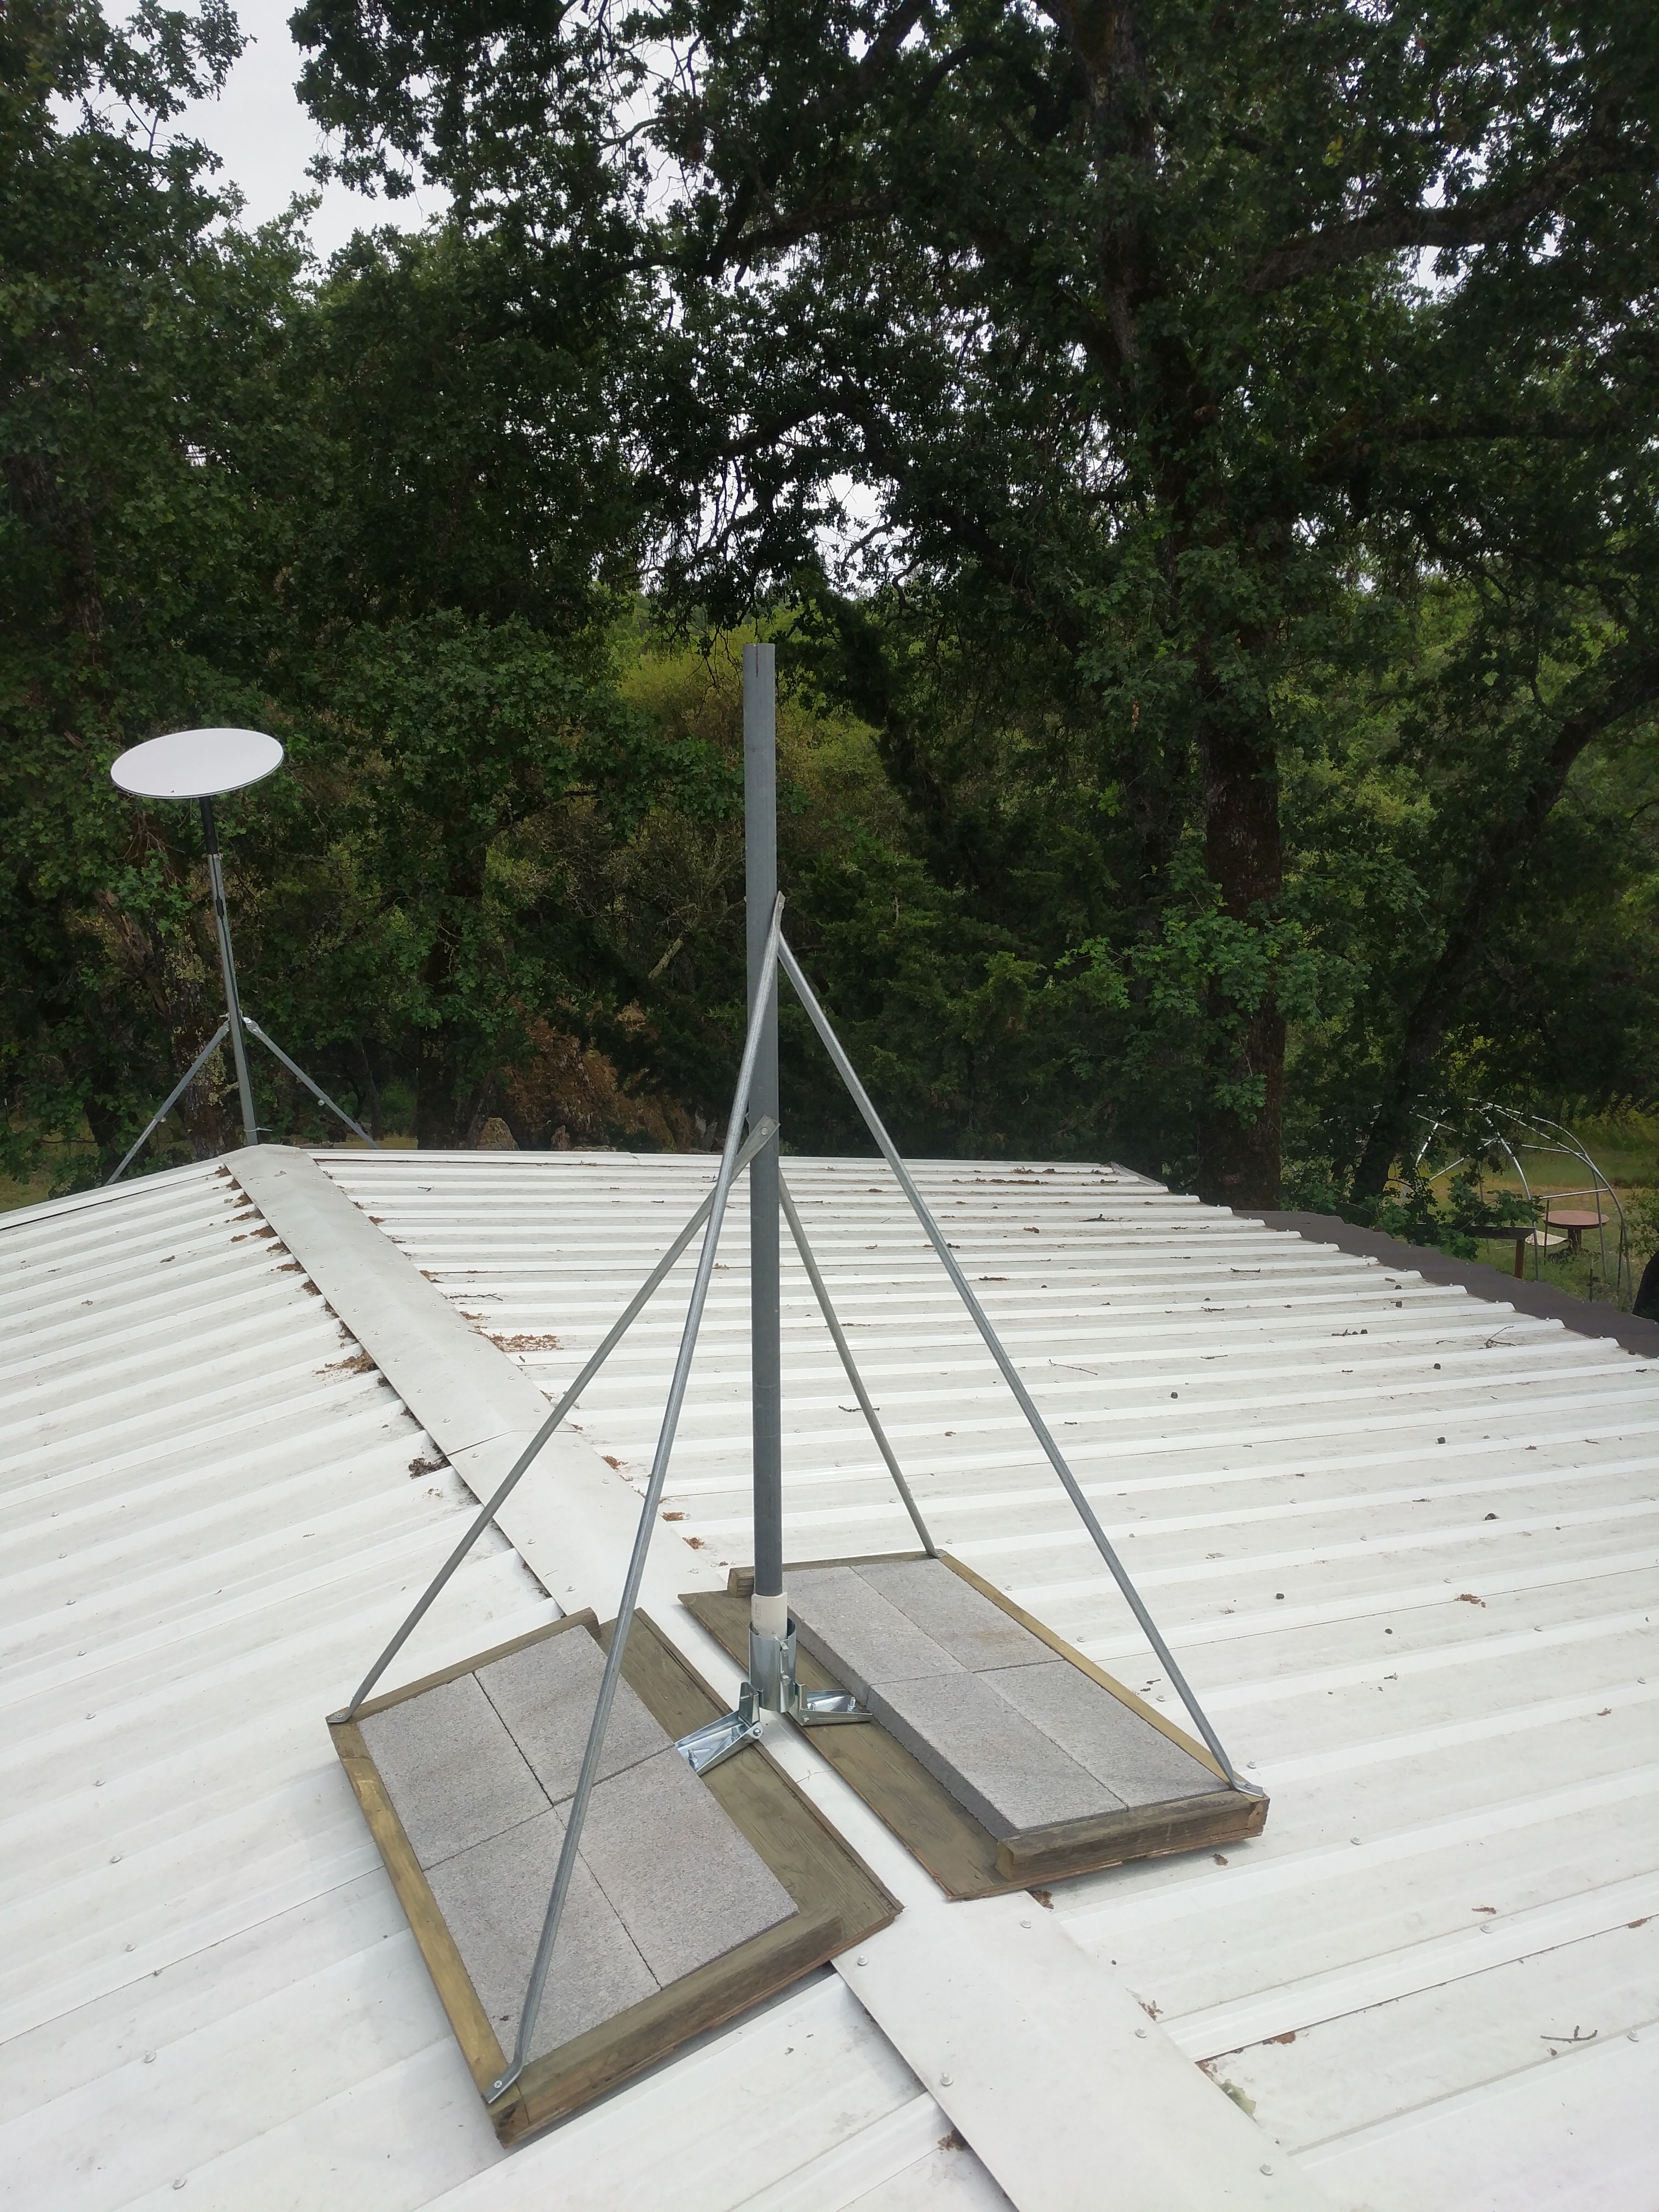 Yup, that's the dish and Mount #2 in the background... and some oaks. The top end of
the main pole is cut to make tabs that can be hose-clamped to the dish's pole.
Yup, that's the dish and Mount #2 in the background... and some oaks. The top end of
the main pole is cut to make tabs that can be hose-clamped to the dish's pole.
The Hose-clamp Broke
 self tapper to the rescue!
Complete
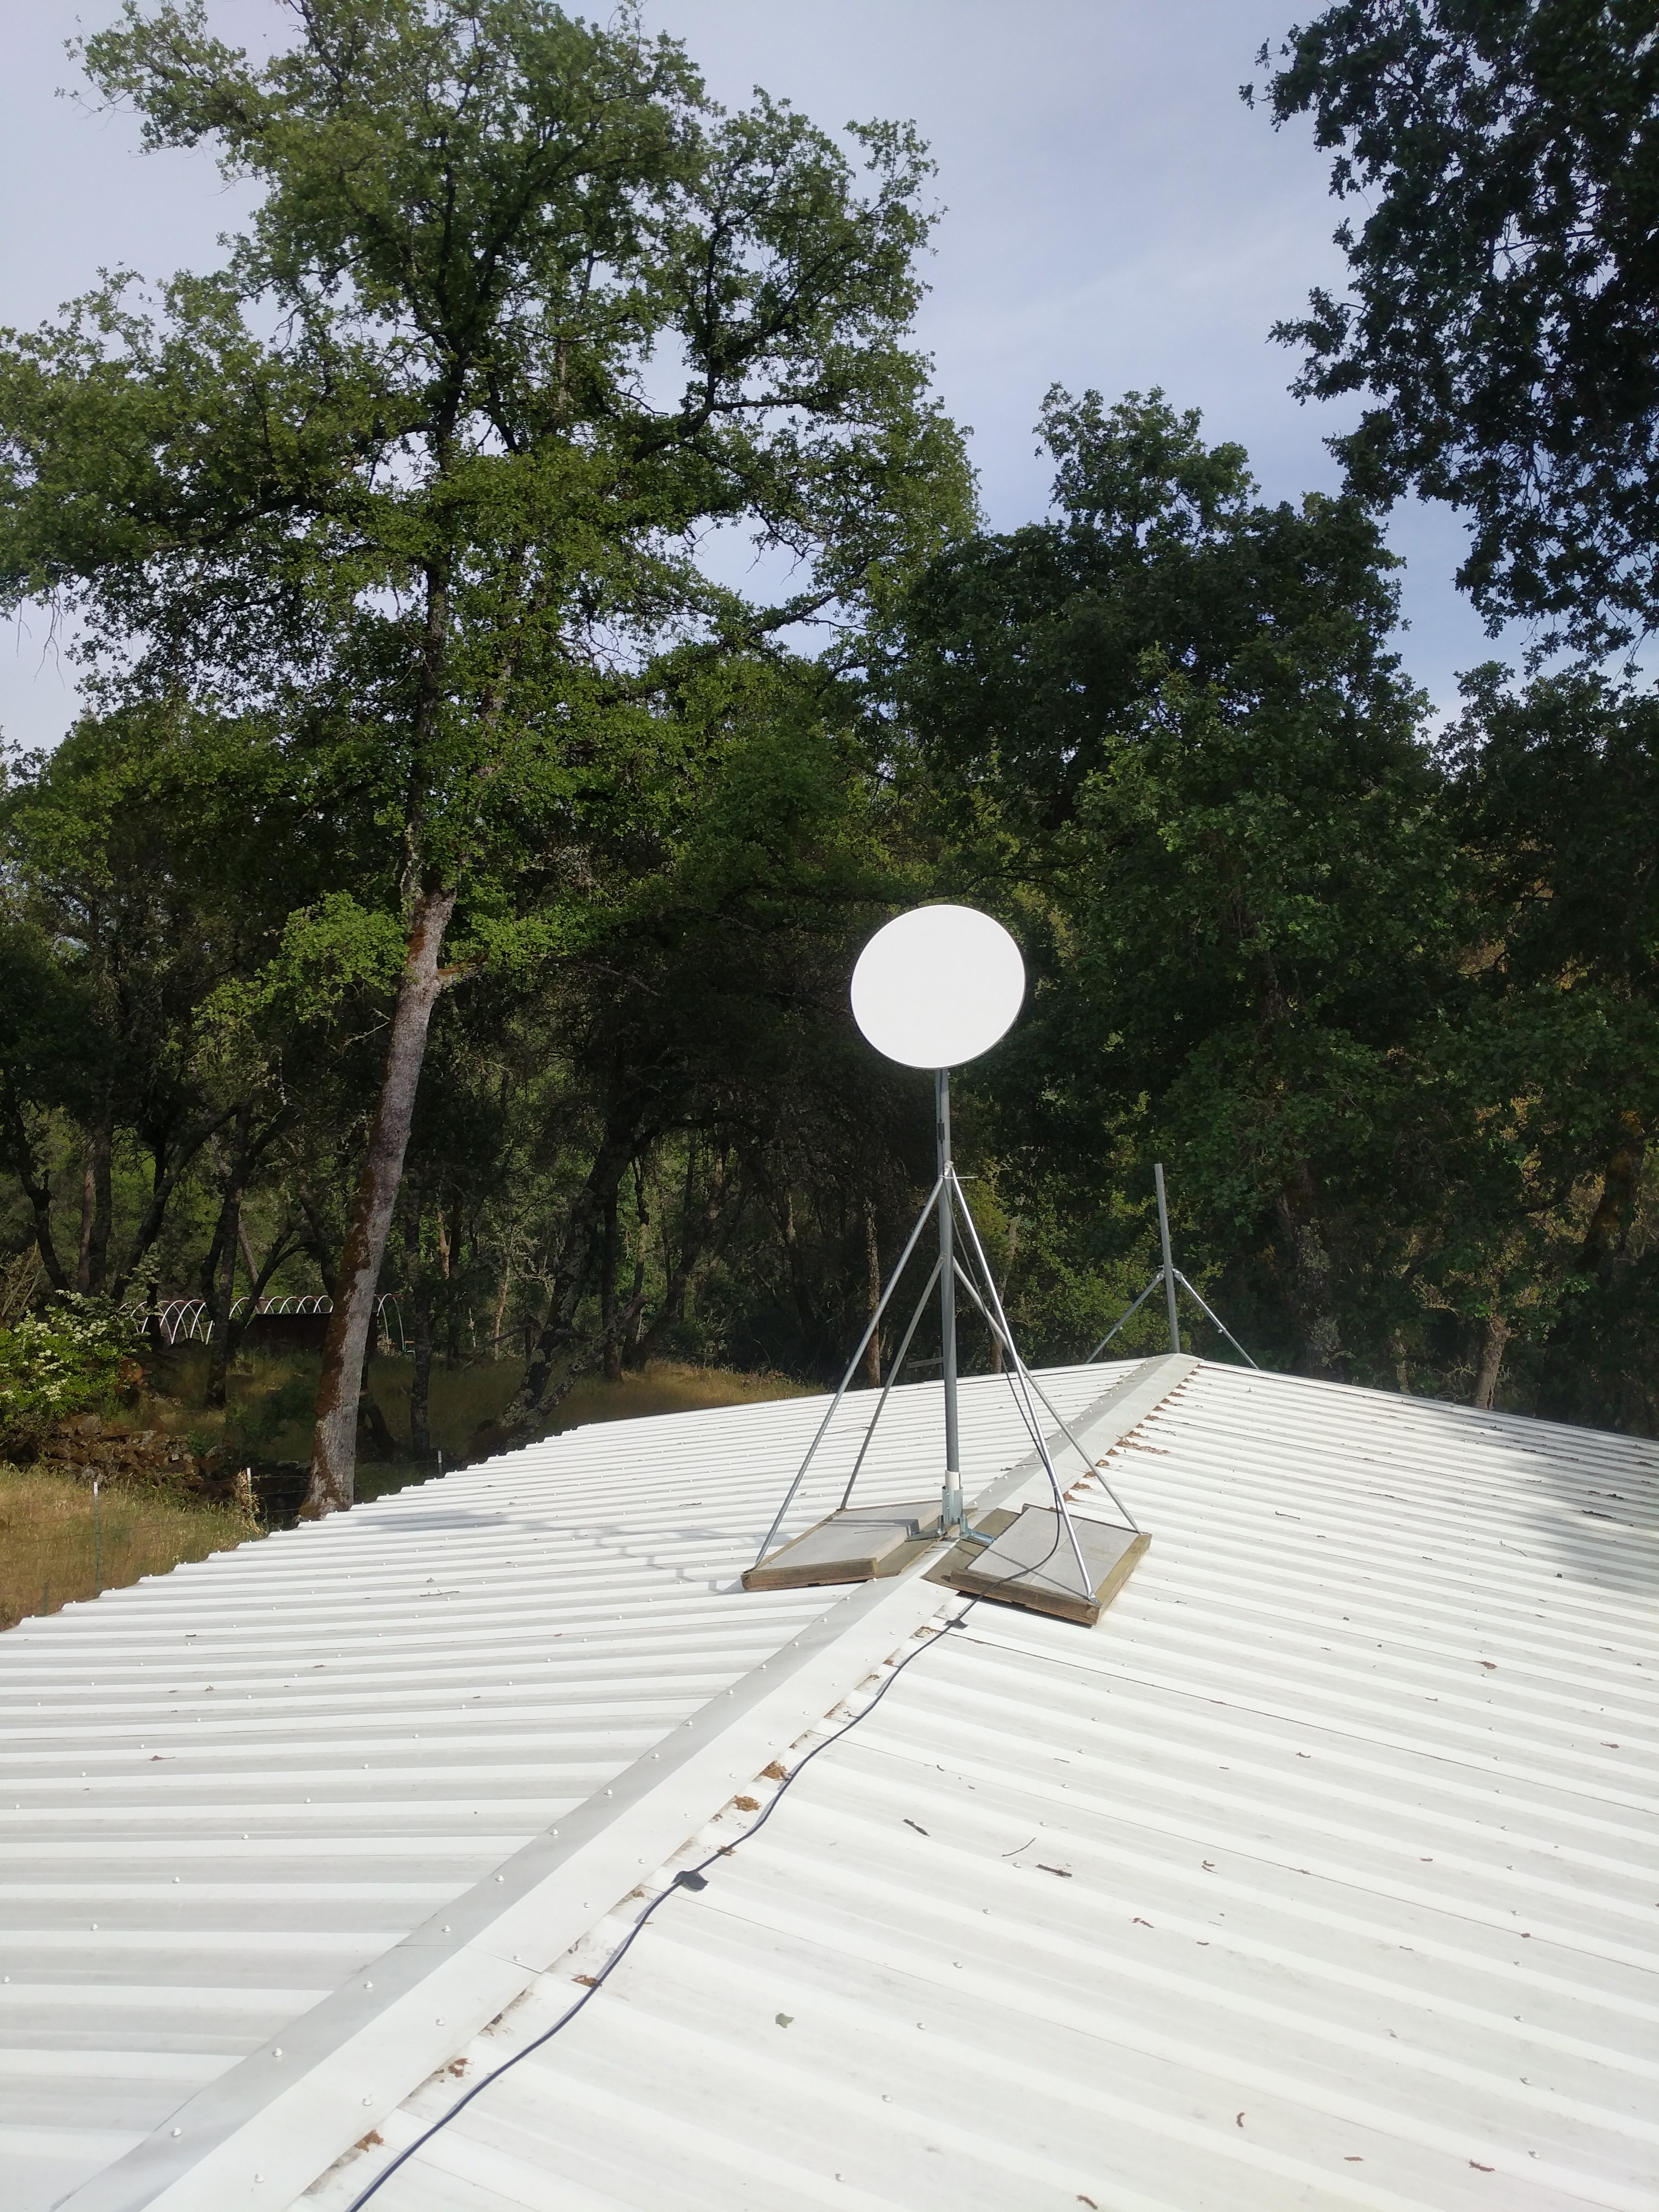 The dish is mounted and ready to be powered on. The cable was ziptied to the mount
and gorilla tape was used to keep the cable in place; and there were some oaks.
The dish is mounted and ready to be powered on. The cable was ziptied to the mount
and gorilla tape was used to keep the cable in place; and there were some oaks.
After powering on the dish, I checked the dish's stats to see if there were any obstructions, and thankfully the mount was setup in a zero obstruction sweet spot.
Cheers,
jezra
P.S. thank you Starlink