
Brass Bell #2
The thing about buying brass sheets, is that there will always be some scrap left over that can be used in another project. Fortunately, another project could also include making another brass bell. :)
Hammer a tube and solder it closed
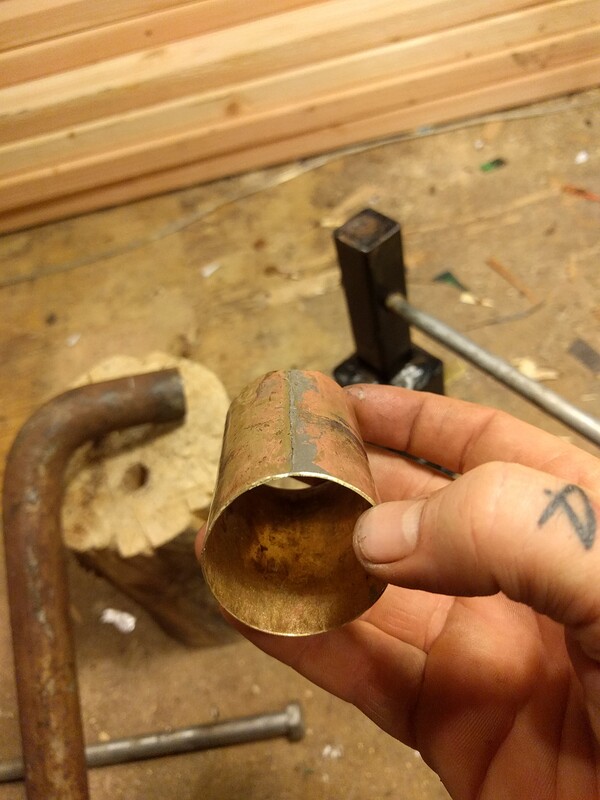 Hot damn, that may be the best seam I've made so far.
Keeping it metric and trace the cap
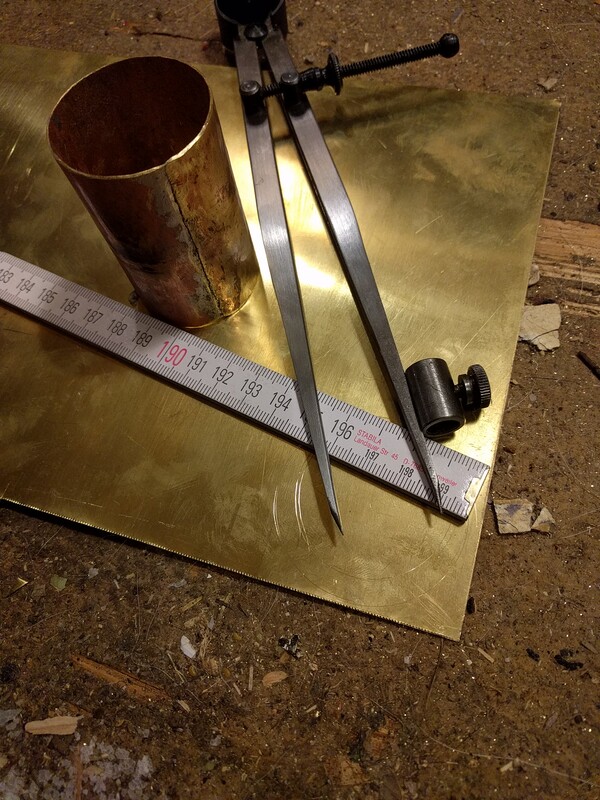 Prior to the start of this bell, I received a package containing some
sweet computer bits and a folding metric ruler. Hell yea, it rules!
Prior to the start of this bell, I received a package containing some
sweet computer bits and a folding metric ruler. Hell yea, it rules!
Cap, and Canon / Striker Mount
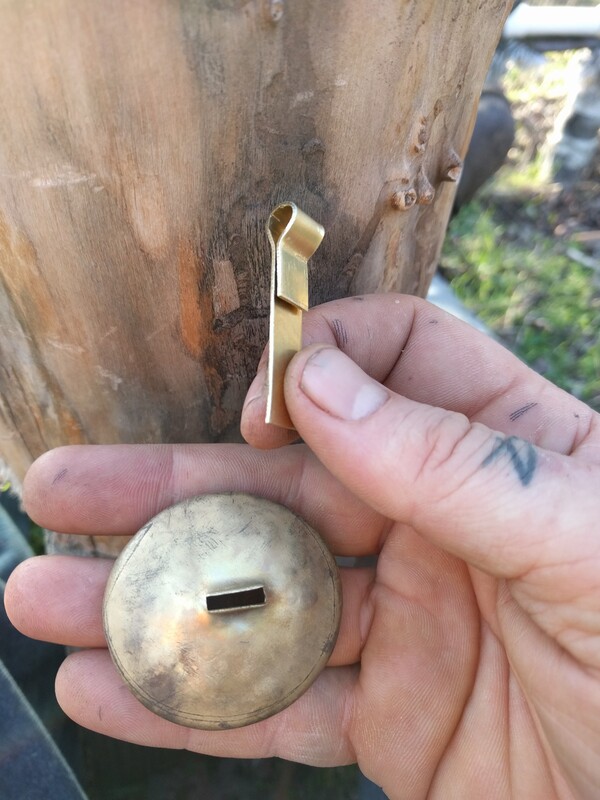 After hammering the cap, a chisel was hammered through the cap from the
inside. A thin strip of brass was cut and then bent to fit through the
hole in the cap.
After hammering the cap, a chisel was hammered through the cap from the
inside. A thin strip of brass was cut and then bent to fit through the
hole in the cap.
Bend the strip
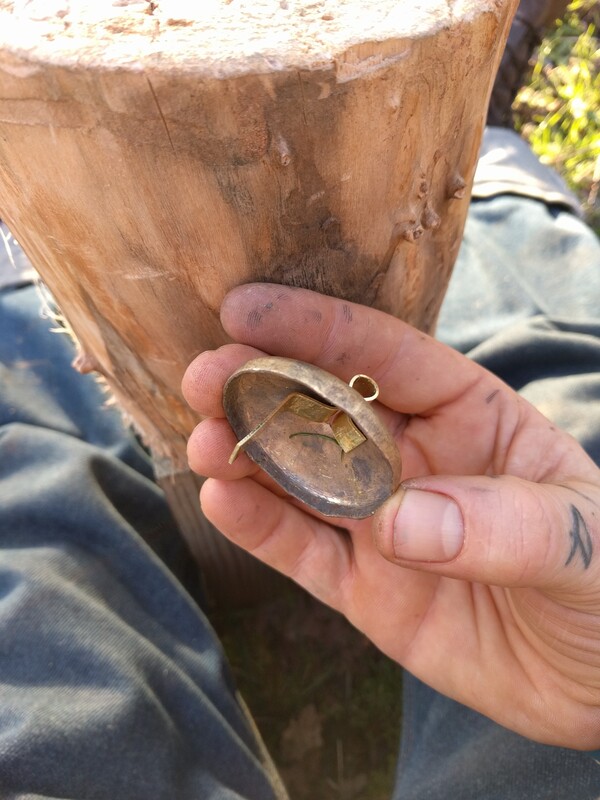 Once the bent strip was fed through the hole in the cap, the strip was
bend some more to fit snugly against the inside of the cap. Then the two
pieces were soldered together and a small hole was drilled in the end of
longer 'arm' of the strip.
Once the bent strip was fed through the hole in the cap, the strip was
bend some more to fit snugly against the inside of the cap. Then the two
pieces were soldered together and a small hole was drilled in the end of
longer 'arm' of the strip.
Dangling striker
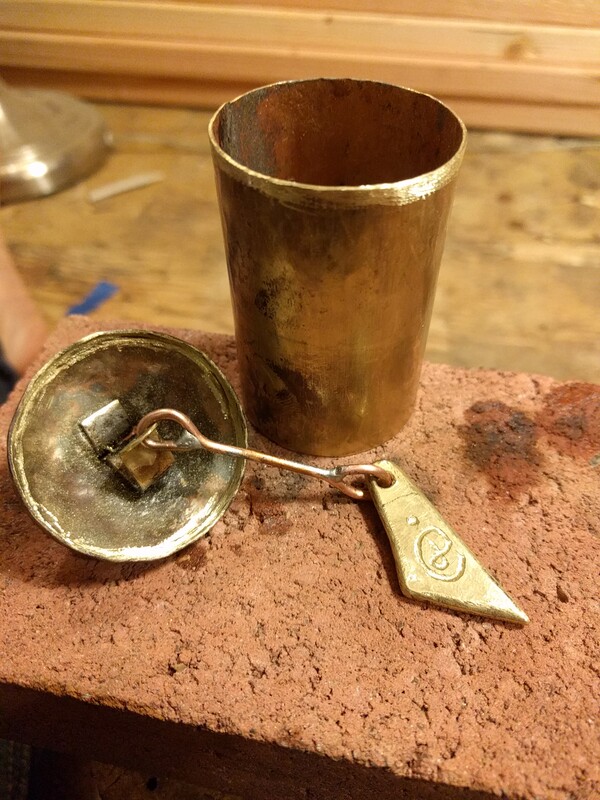 A bit of copper wire suspends the striker. The final two peices of the bell
are ready to be soldered.
A bit of copper wire suspends the striker. The final two peices of the bell
are ready to be soldered.
Finished!
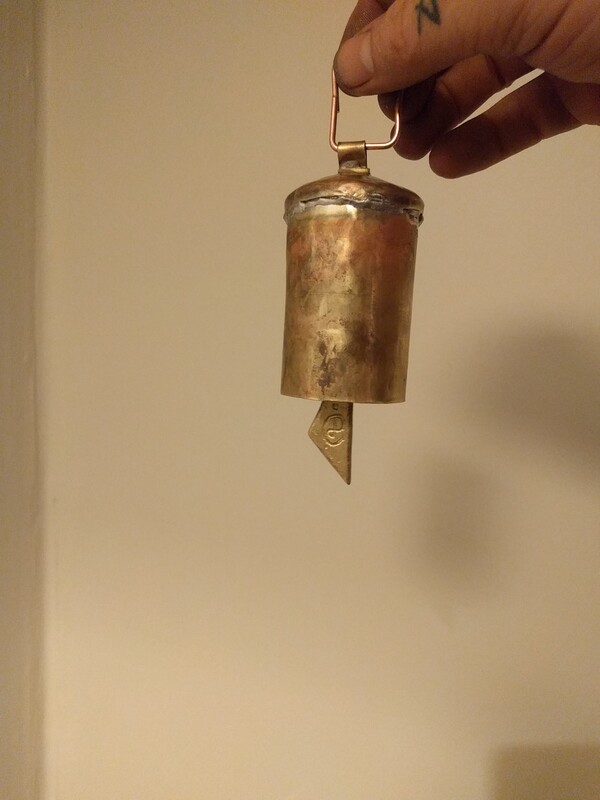
Ding Ding Ding!
Woooweee what a fun time bellcrafting can be. Cheers :) jezra